Slide on

Prospecting Australia

Help Support Prospecting Australia:

This site may earn a commission from merchant affiliate links, including eBay, Amazon, and others.
most of this type of canopy have a problem with water running back down the doors when opened in the rain and falling inside...... they need drainage channels or a water proof seal at the top or both.. :)
 
1415189414_progress_aug_021.jpg
Insertion rubber is a good idea, or even the self adhesive foam strips used in the construction industry.
The water problem with the doors i solved with aluminum channels(not sure what they are called but u shaped with a tail) one above the door, one on the door and believe it not, insertion rubber under the channels and over the hinges. This gave 100% water exclusion when the door was open
 
1415509412_centaflex_photo.jpg
The next challenge were the doors which I kept the same profile as the mainframe. I did buy, and had intended to use centreflex hinges but as mentioned earlier the door lintels had a 4mm sag over 2.0m which when installed these hinges would not seal along the top of the canopy skin.I found this out while puting in the 4th screw so the hing was not returnable. The more screws I put in the hinge to take up the gap the uglier it looked. In the end I cracked the sh@#s and ripped it off. I finally bought aluminum cogged hinges (dearer than the centreflex but much more forgiving) which I thought would be strong and weather proof. In hind sight stainless steel piano hinges and the same weather seal made of the insertion rubber (shown in previous post) would have been easier and cheaper.
I had double seals, an inner and an outer, I think they are called bubble seals, will check up on that one

Instead of a reverse fold, which I couldn't do on my home made bender, I used 30x25mm angle aluminum, riveted onto the inside of the door frame to hold the inner seal. This also became a cosmetic item on the fit out. The outer seal was simply attached to the skin of the door. This whole set up is backed up by a positive pressure fan that I use when mobile on dusty roads. Works a treat with absolutely no dust even through the rear door!!
1415510364_ipad_pics_032.jpg
 
Pinchweld was the seal and I used pinch weld small. I sourced this at a well known rubber supplier for a "you beaut" $7.90 per metre, but luckily before I bought 32 meters(yes that's what it took for 3 doors inner and outer seals) I got onto a different outlet by chance and they supplied the same stuff for $4.00 per meter. So much for the previous crowd looking after the customer!!! If any one is looking for seals, gas struts, door handles, latches, or any of that gear for a canopy get hold of me thru this forum and I will give their shop name and number.
 
I cut out for the wind up stands which I made out of jockey wheels cut and extended with steam pipe. The mistake here was leaving the off centre wheels on, which on concrete in the garage worked fine, but as I found out later were useless on soft ground. The best option was to replace the wheels with a flat pad, not as versatile but more stable.The 40x40 box can be seen in the frame pics for inserting the wind up legs, with a nut welded permanently to the inside of the frame for the bolt from the outside to lock it it all together.
As the skin was zincalume I only sprayed a dust coat of etch primer all over for bonding the top coat. For the top coat I selected a marine polyurethane mainly for the durability and ease of painting. This paint can be applied how you want, ie spray, brush roller etc. I opted for roller because I didn't have forced ventilation for spraying and was a bit unsure whether I could get my spray gun clean enough after use. This paint dries to a very hard finish. The poly came up with a high gloss finish on the first coat, and I should have applied it thicker and would have only needed one coat. As it was the second coat had a VERY light pealy look that came from the roller nap. Any painters out there would know a way around this but I was still happy with the final finish. I suspect I did not allow enough time between coats(18hours) :p
I removed the doors and painted them separately.
Before painting I also cut out for all latches.
1416110989_1255464_015.jpg


1416110385_ipad_pics_025.jpg
1416110596_ipad_pics_030.jpg
1416110689_ipad_pics_026.jpg
1416110771_hhghgsdvf_071.jpg
1416111054_1255464_008.jpg


More to come :p
 
For insulation I went to a local appliance store and got permission to take all the sheets of 25mm thick coo-lite foam from the dumpster out the back of their store. This had been used to protect fridges in the box's from the factory. I just cut it size to fit in between the frames behind the metal skin and siliconed it on. The difference in temp between the walls with insulation and the rear door which is not, is quite a lot.

At this stage I made and welded on the striker plates for the doors, attached the door handles making sure to seal everything with high quality sealant.(Sikaflex flexible sealant)
The water pump holding frame had to be fabricated and the pump and pipe work installed and tested. Also the filler pipe for the water tank was installed with a lockable cap on the outside. The pump is the diaphragm type and so far has proved OK. This was purchased thru the internet for $50.

I had an electrician doing some work at my place while all this was going on so I got him to make up the 240 volt inlet/outlet/circuit breaker and gpo which I installed as well. The cost of the 240v gear came to about $75 from a local elect. supplier.

All this gear had to installed at this stage as I knew I was going to line inside with ply.

Next Plywood and prewiring

1416623238_1255464_001.jpg
1416623101_1255464_003.jpg
1416623286_canopy_006.jpg
1416623324_canopy_013.jpg
1416623411_canopy_015.jpg
 
Nice work Colby , it's great to be able to watch your build coming together . Keep up the progress pics as I and I'm sure many others appreciate it.
Cheers
Luke
 
Thx Luke, it's good to get some encouragement. Will keep up the pics and descriptions. There's plenty more to come and as always if there are questions or comments I'd appreciate them.
 
For the pre wire I first had to have a idea in my mind what I wanted in the way of electrics and their power consumption. There are lots of sites on the net where you can get and individual wattage use for any number of gear that you can instal.
I'm going to stick my neck on the block here and the purist's may scoff but after two scares on extended stays, being trapped by flood waters and one by a cyclone, I decided that sat TV was the answer for me. Now as I spend a lot of time out in the bush by myself(rightly or wrongly) but people do know where I am and I do carry an eperb, 1st aid kits, survival gear and food etc. The reason for the Sat TV was that I could pick up proper weather forecasts be it on radio or Tv, and instead of going bonkers after 2 or 3 days had some entertainment IE footy etc. I can only listen to the same music a couple of times before I get sick of it! My days of "roughing" are over, hence the home away from home.Bet you if I was watching the State of Origin and some one who was in a basic camp, they would soon be over!
Any way back to the pre wire. I wanted an individual circuit for each item and although this meant more cost for wires, it also meant I could isolate each item if needed. I wasn't too sure of the implications of common earth return through the canopy frame and the ute body with one battery in the canopy and the normal start battery of the ute. All that was earthing the canopy to the ute tray were 8 bolts which probably would have been fine for earthing when the whole system was newly finished but down the track it might have caused issues. Dunno, I'd like some comment on that one. All the items have been individually fused on a central fuse block in the back. The front batt is connected to the rear via two 80amp fuses and an isolation switch. My understanding is very basic when it comes to electricity and maybe all this was an overkill so in my mind I made it as safe as poss.
Below the gear that installed

50 litre fridge connection, Amp( there is reason for this), Poss pressure fan,TV,Sat decoder,Digital Reciever,2x Cig lighter plugs,6xLED lights,Pump

All this is run off a 110amp/hr AGM battery and a few of you might comment that there is a lot of gear to run off a small battery, but there is only me so I can control the usage.
For the main charging there is a 170w solar panel on the roof, and the alternator when mobile. The input is controlled by a Ctek DC DC charger which selects?? the best input that is available. Without getting into the electrical side this system has so far proved up to the task on the couple of shakedown trips I have down but I admit I am fairly careful with what I use. As a precaution I will be installing a volt/amp meter to monitor usage and as finances permit I will carry a fold up solar panel.( will tell you why later). I am also carrying a small inverter genset but this will only be a back up to run a 7 amp Ctek float charger
Because there is a false ceiling in the kitchen it was a no brainer to run all the wire distribution up and through there. I put in 4 ducts and separated the wiring to run to their areas. This also was an added insurance for when I attached the final finish to the kitchen roof. An additional duct was run down inside the front wall to carry the heavy wire from the ute alternator. I labelled each wire because it would be awhile to the final fit out. I'll add the ply lining in the next post as I don't know how much space I've got and I got carried away with more of the wiring than I intended.Will put pics on next post
 
Pics from the previous post
1416891276_canopy_034.jpg
1416891308_canopy_036.jpg
1416891349_dffd_025.jpg
1416891830_canopy_035.jpg
1416891866_dffd_025.jpg
1416891910_dffd_022.jpg
1416892069_canopy_032.jpg
1416892236_canopy_048.jpg


There was additional costs of tools IE crimpers,heat shrink torch,soldering irons, zip ties by the bag, beer, lotsa beer,strippers(for the wires :lol: :lol: :lol: :lol: ). The 6m of heavy wire from the front batt was a large cost as well as the next size down for the fridge. Even now I cannot remember the wire sizes I used although I did at the time after much study on the net and asking people in the know. What ever I found was the size needed I went up to the next size to be safe.

Next, ply lining
 
I am not qualified in sparks but that is a bloody good idea to have an earth return on all wiring.
I have seen some inverters crack up some thing shocking when using chassis earth.
Plus also for your safety.
Very, Very well done mate. You should be proud of that.
 
1417084850_2014-06-23_17.13.28.jpg
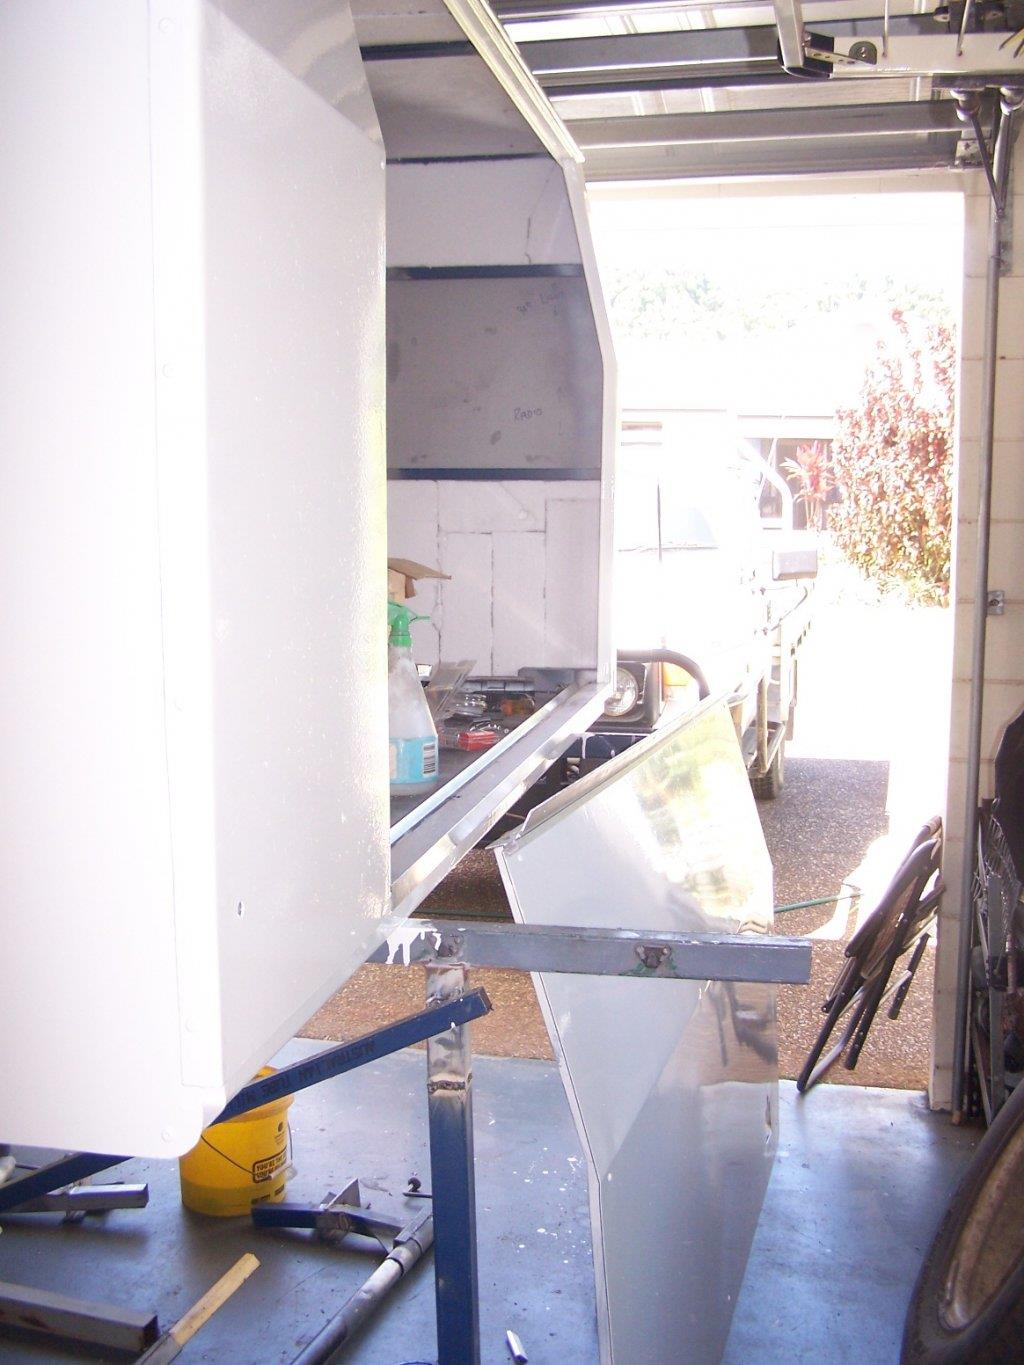
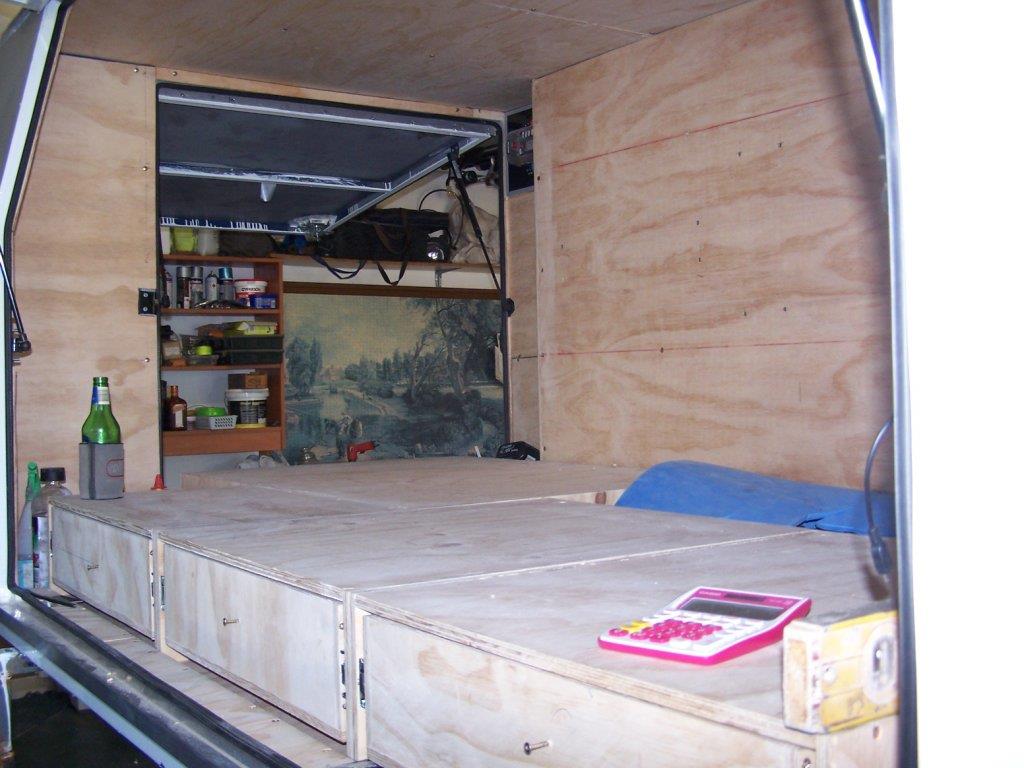
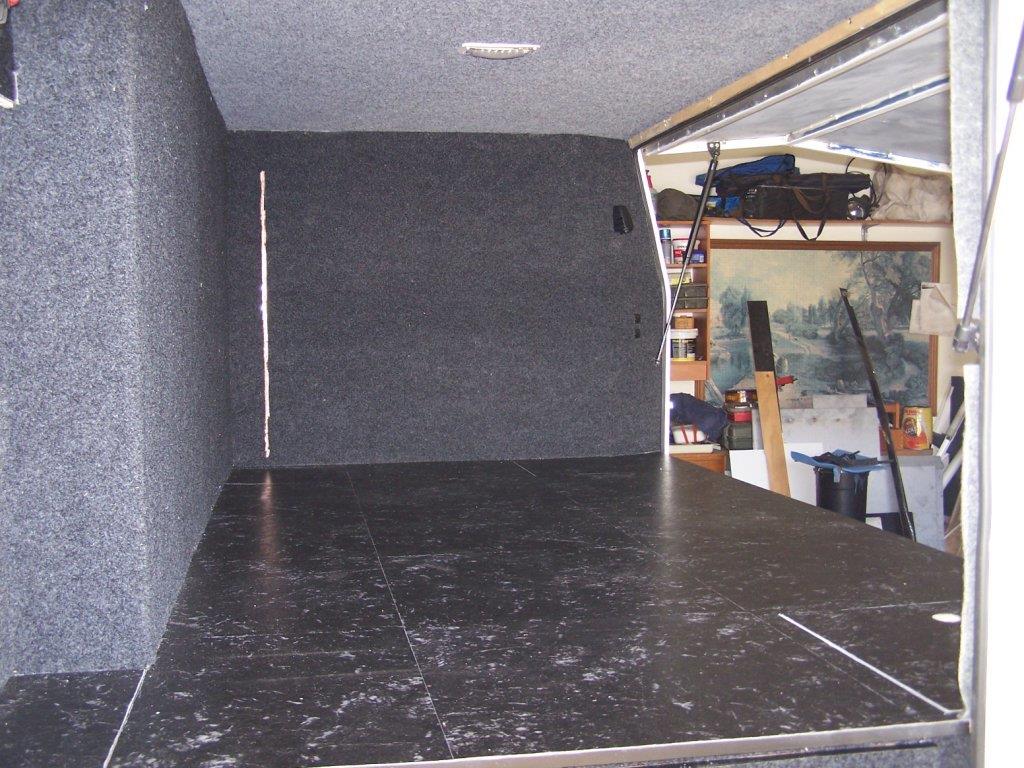
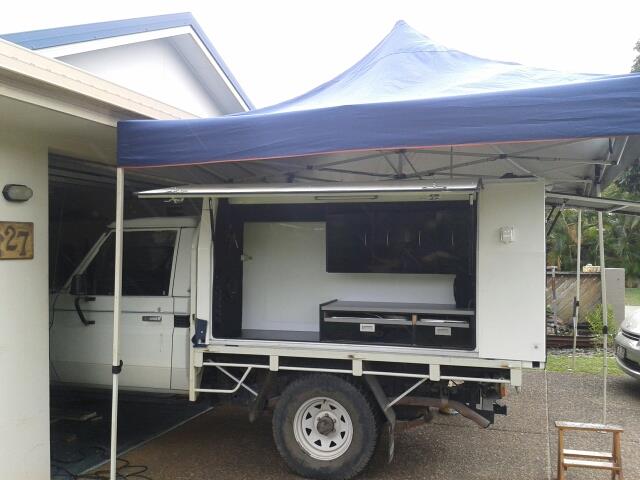
As the canopy sat on the tray of the ute I was concerned about dust and moisture coming up inside from between the tray and the floor. If you go back to the first frame pics you will see I framed out sufficiently to lay ply down as a weather proofing. I had a friendly neighbor who worked in the construction industry and he scored me 2 sheets of used 18mm form ply. This stuff has a black waterproof coating so most of the work was already done for me. He advised me to paint the edges with coldgal paint as this soaks in and waterproofs the layers of ply. Any gaps, old screw holes, joins after I scribed(cut to shape) the sheets and screwed them down were filled with a generous application of silicon.I didn't have to fussy with the silicon finish as the whole floor would be hidden by the drawers. I will concede that all the ply added to quite a bit overall weigh (18kg)I felt that for the cost I couldn't complain. Think of the cost of doing it in aluminum at $40sqm over 3.6 sq m speaks for itself.
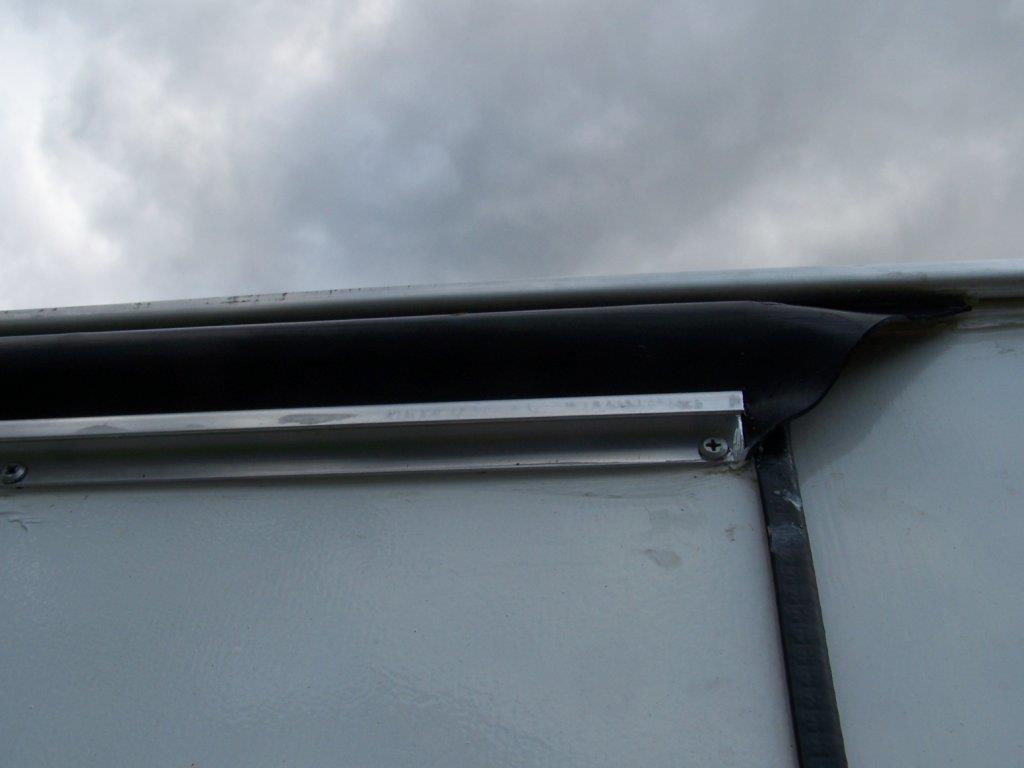
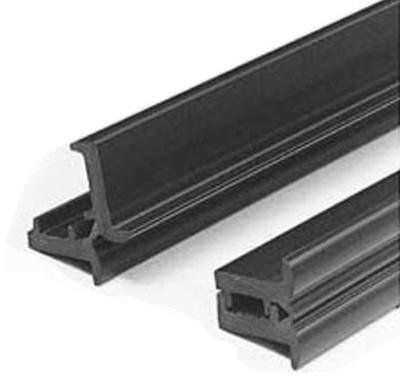
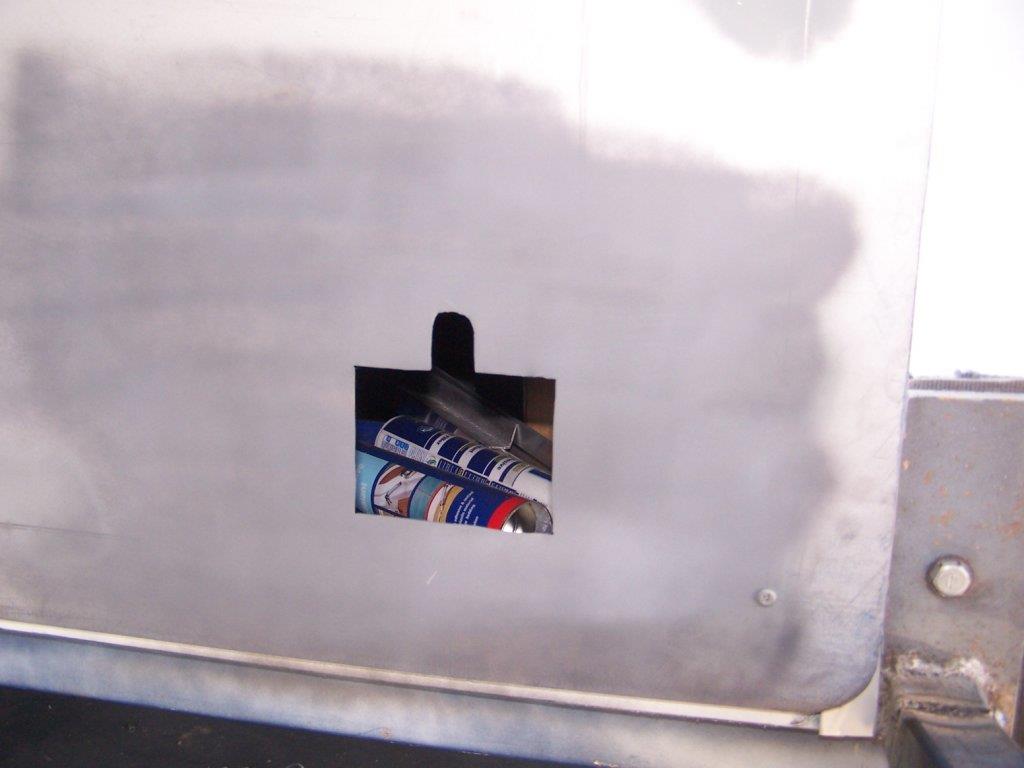
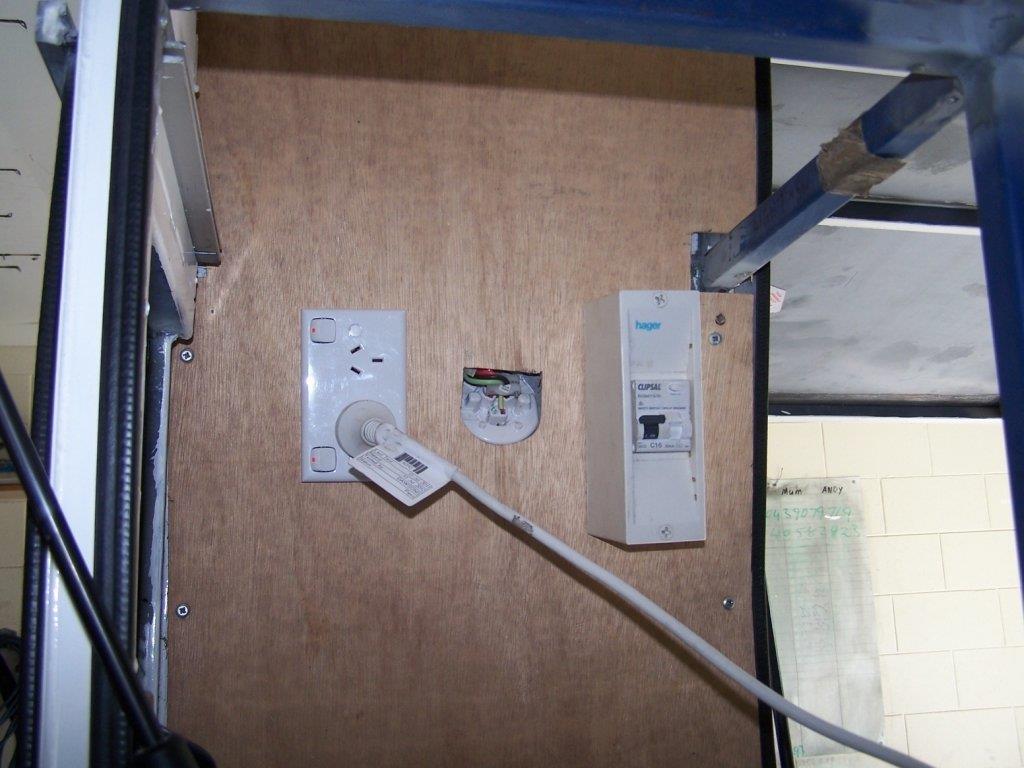
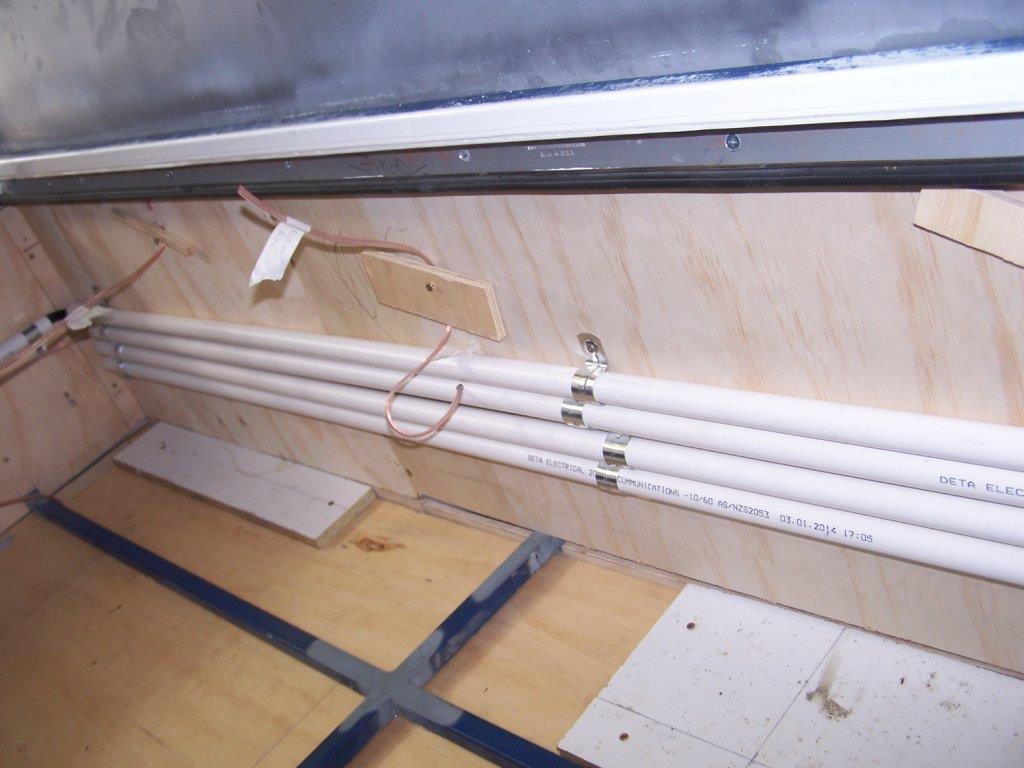
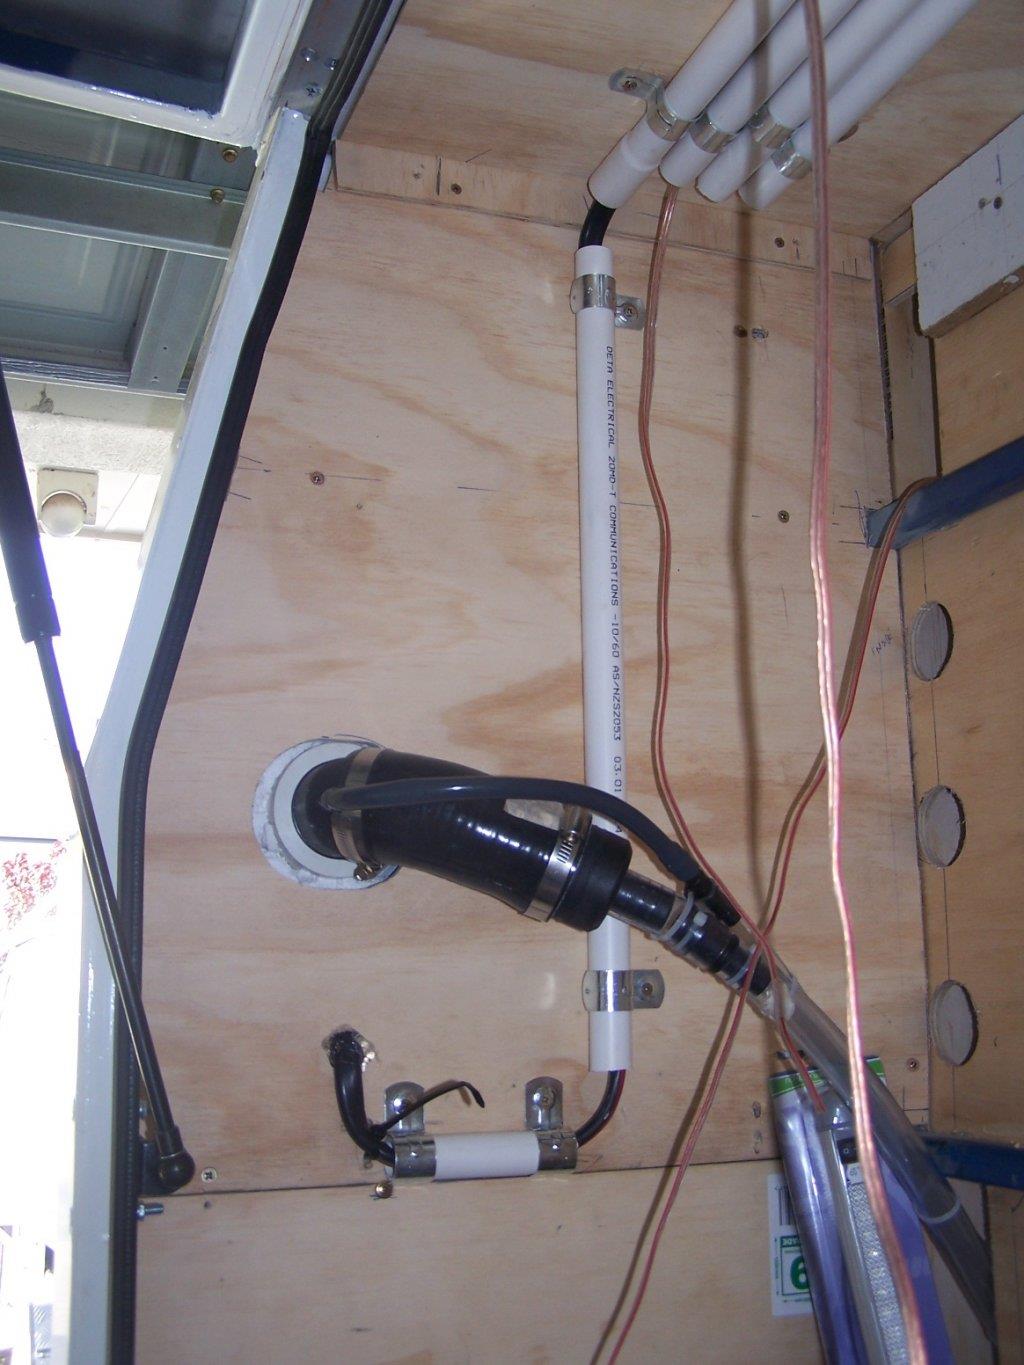
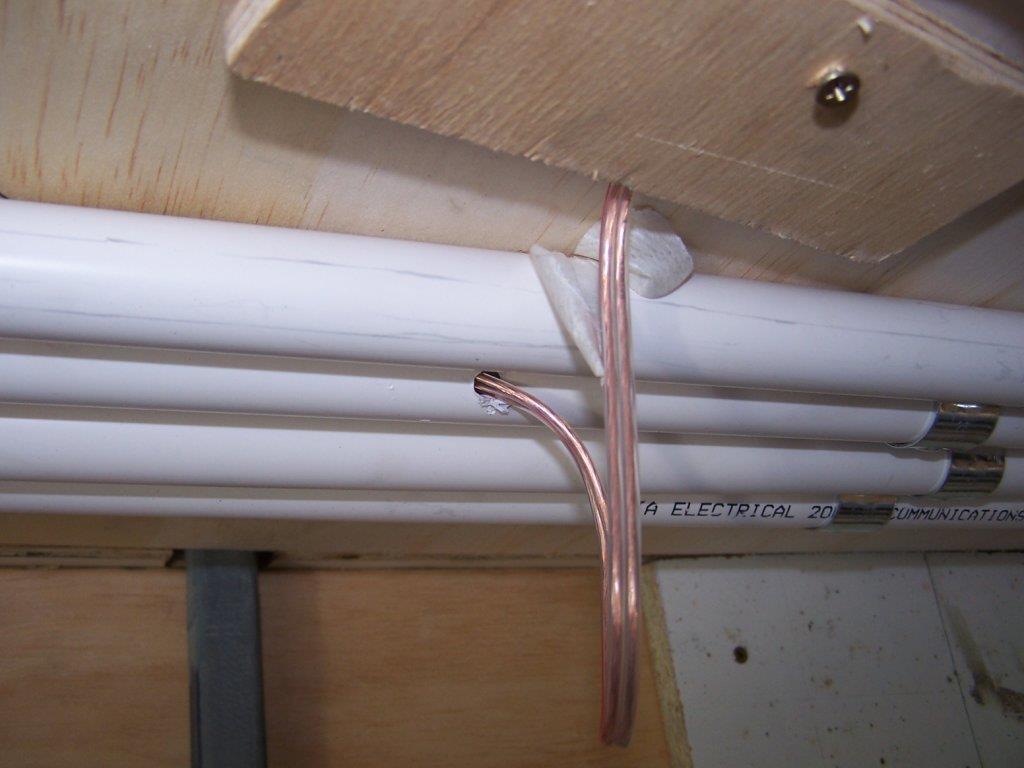
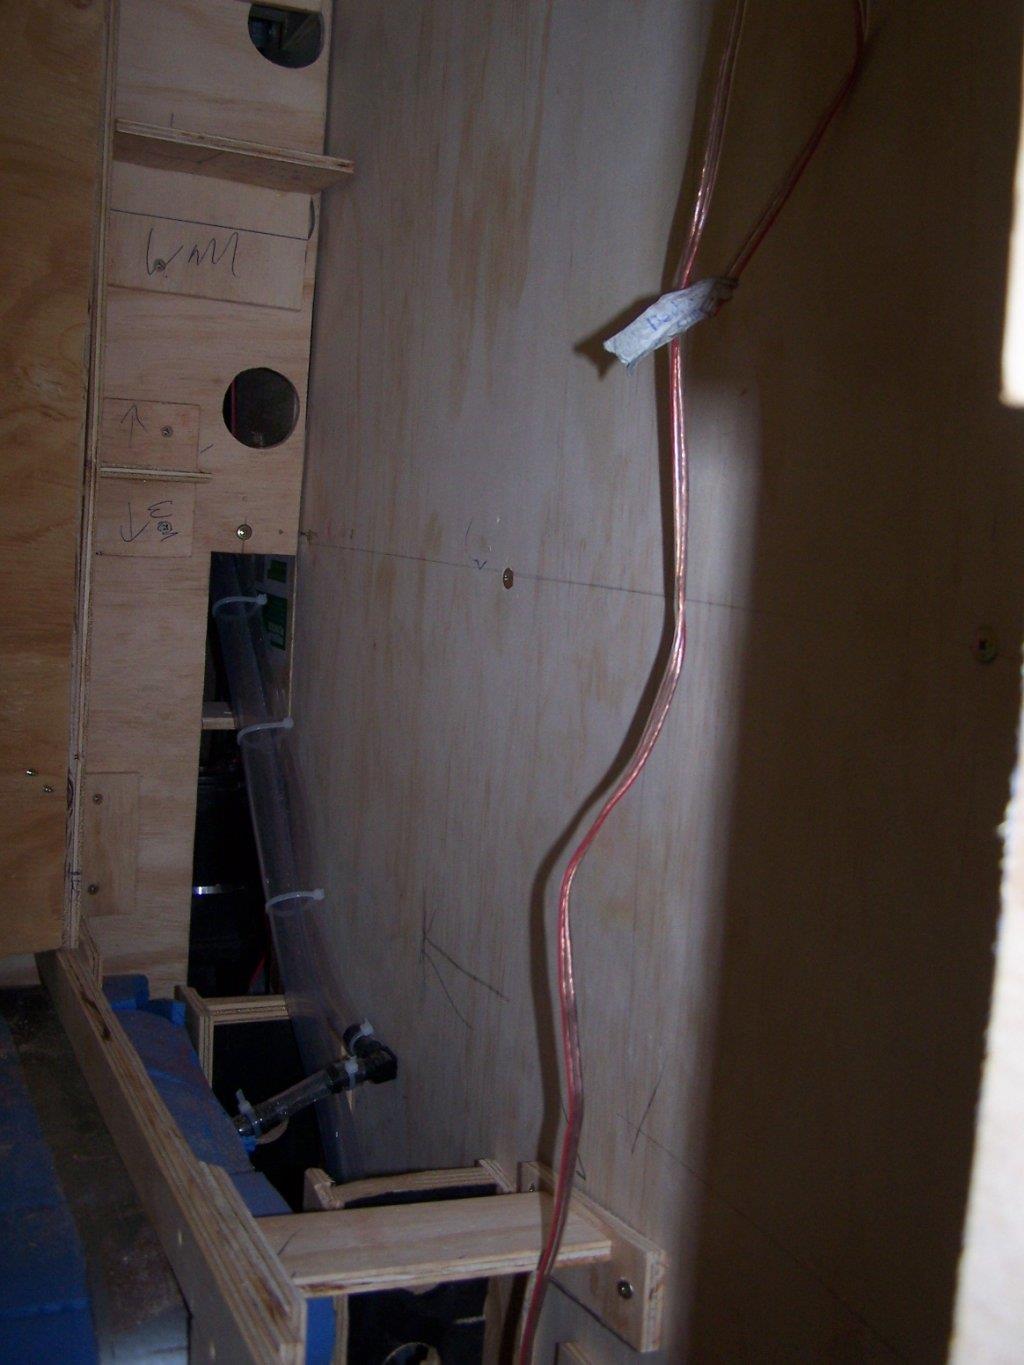
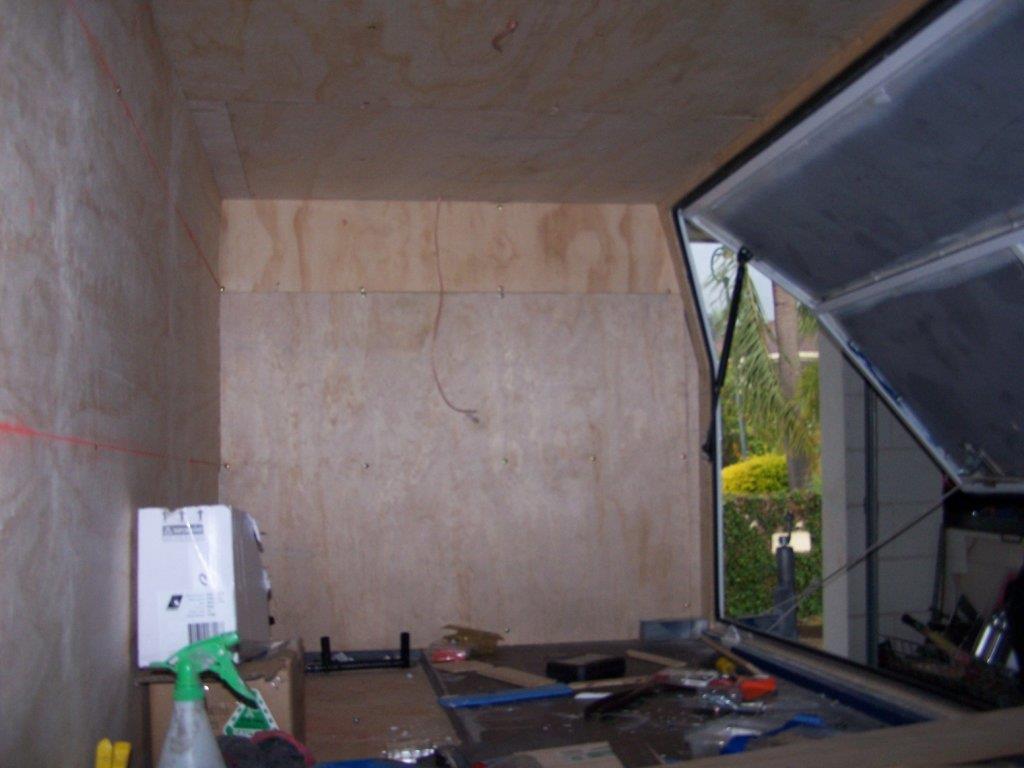
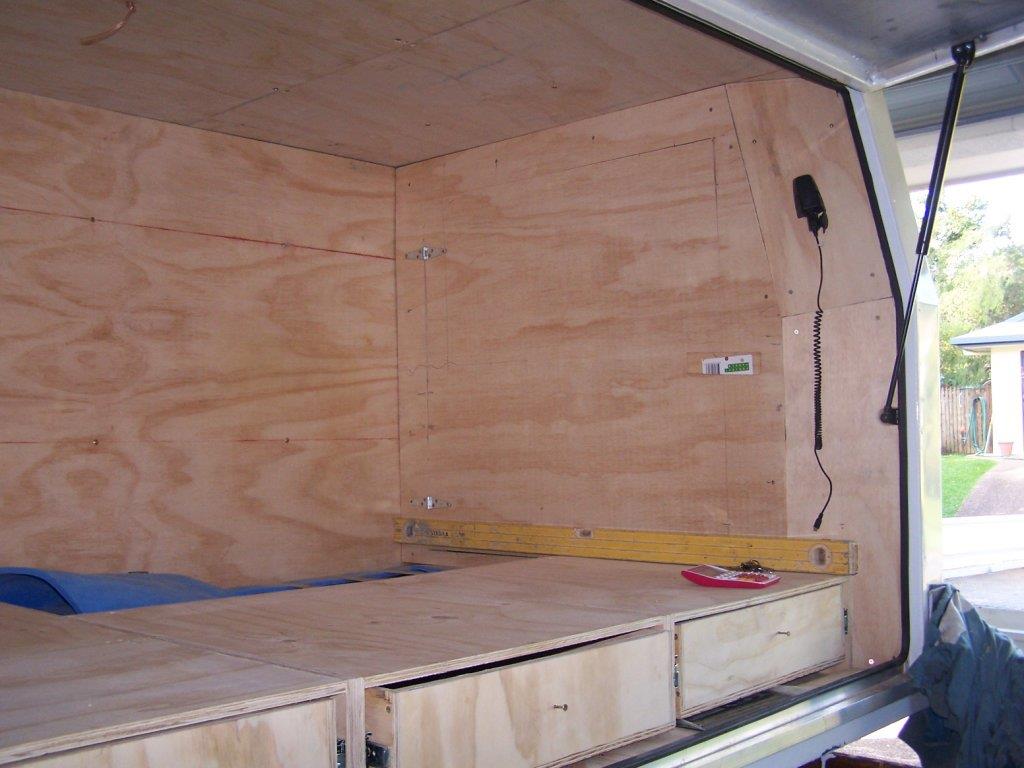
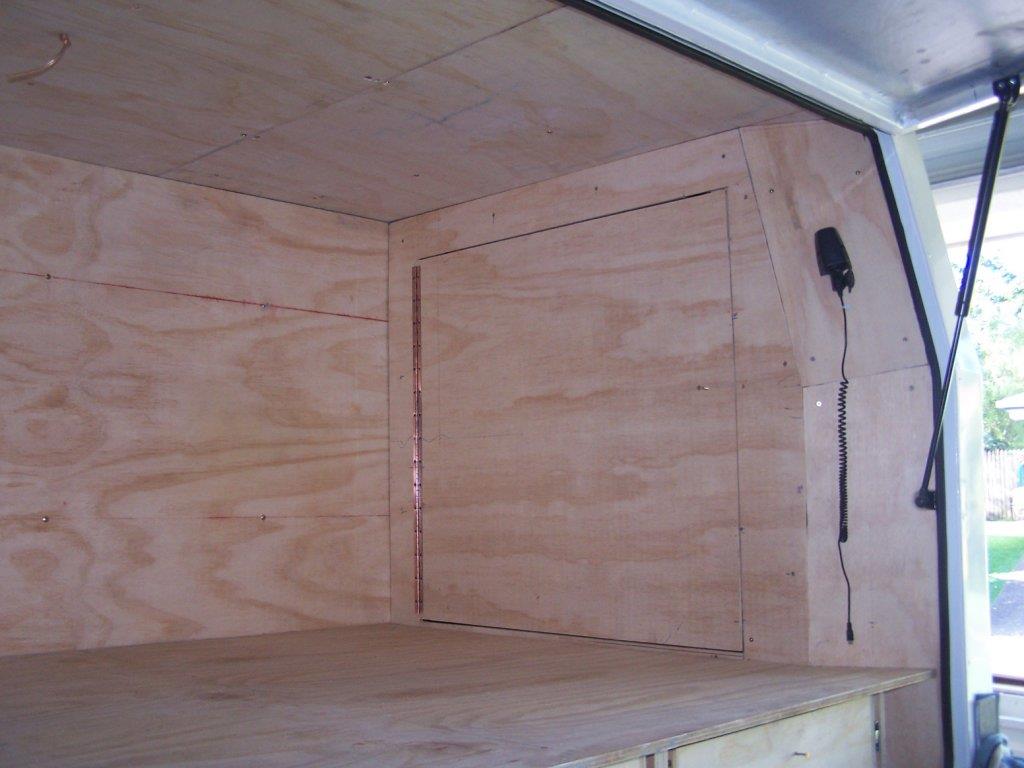
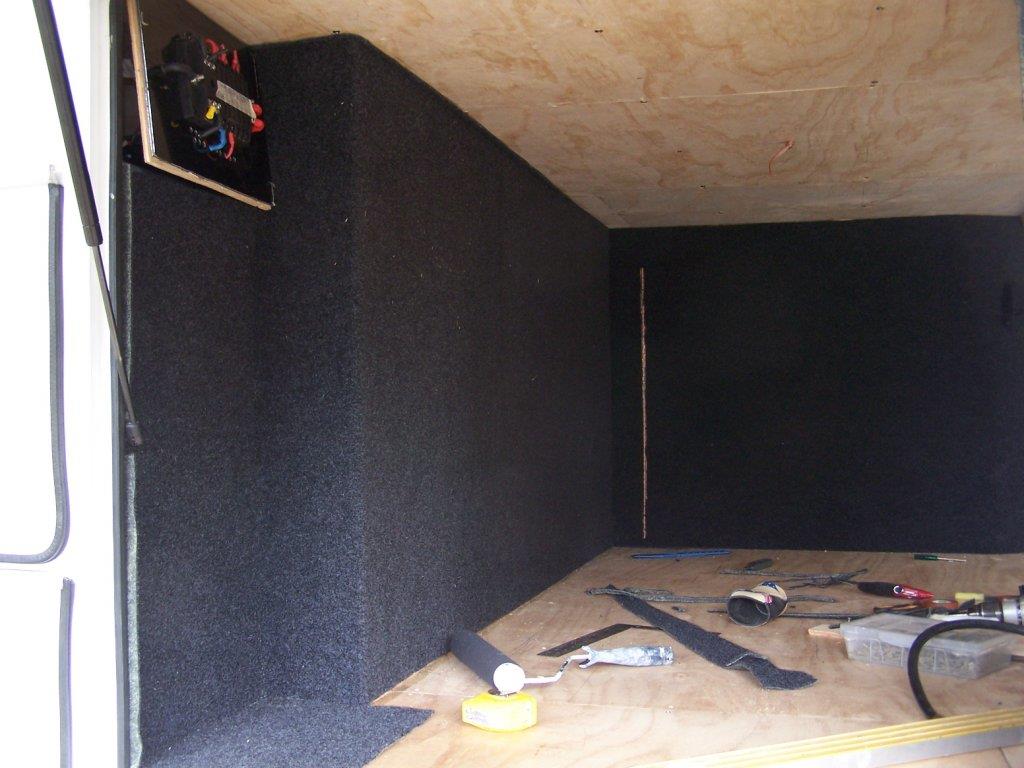
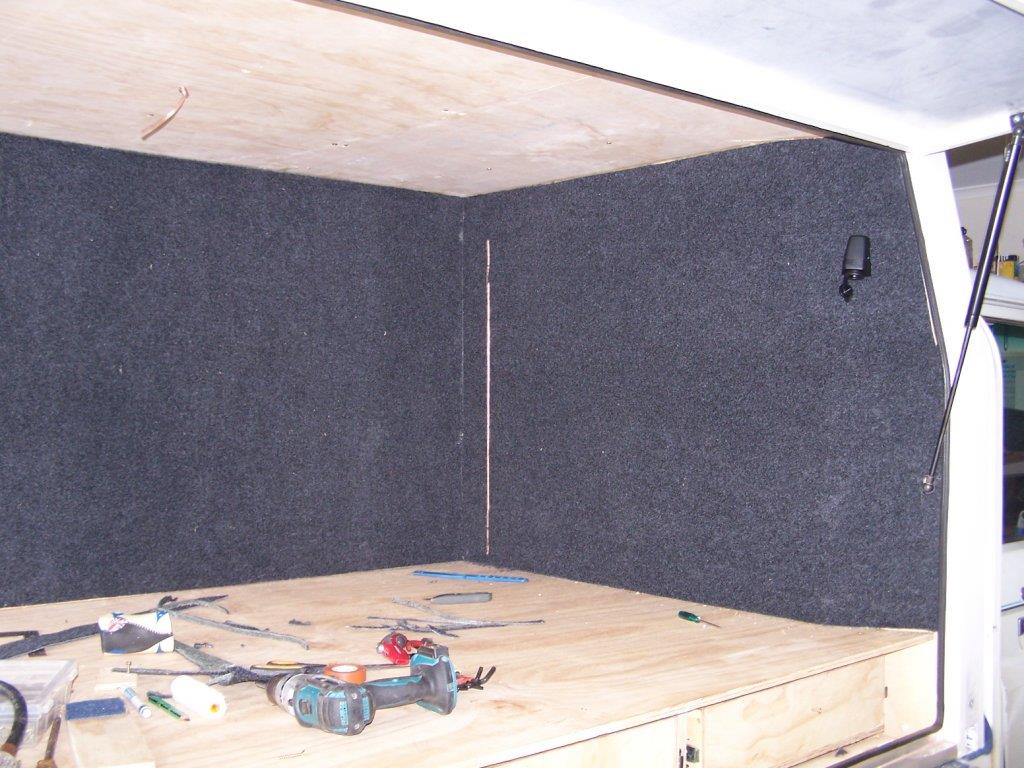
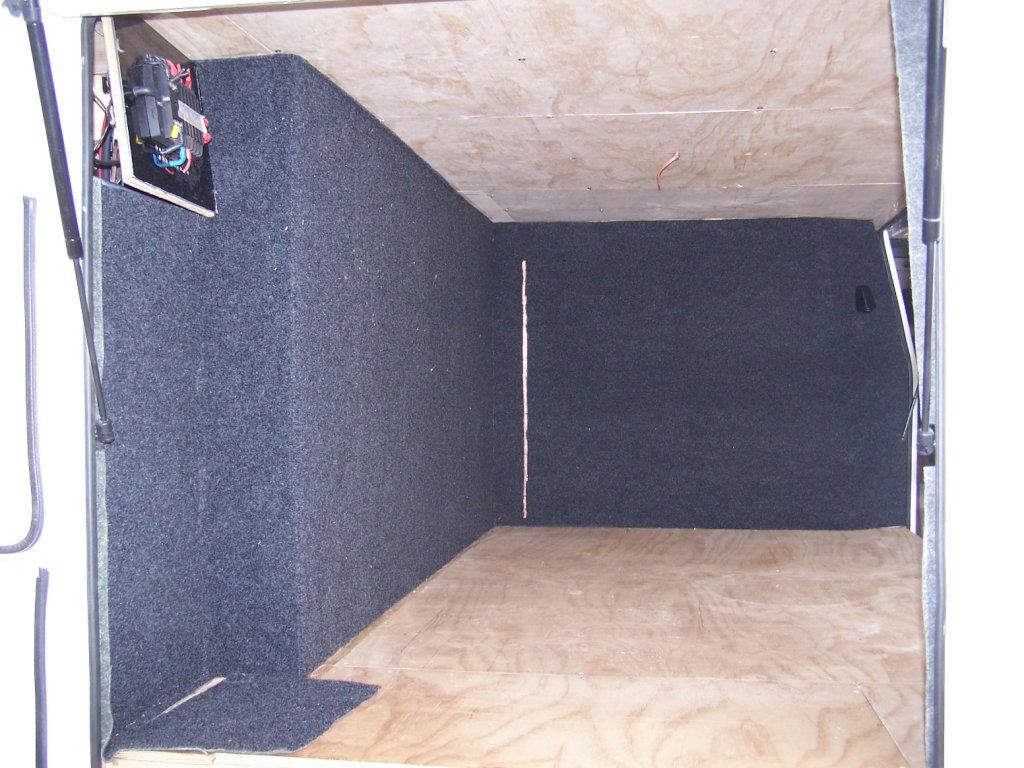
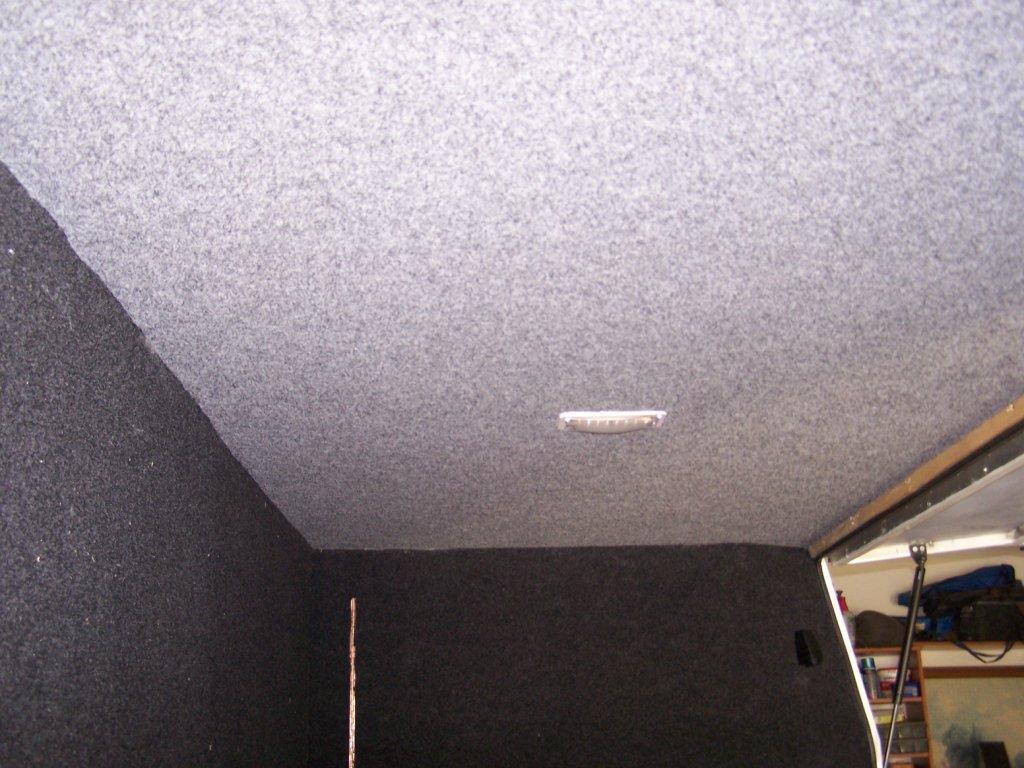
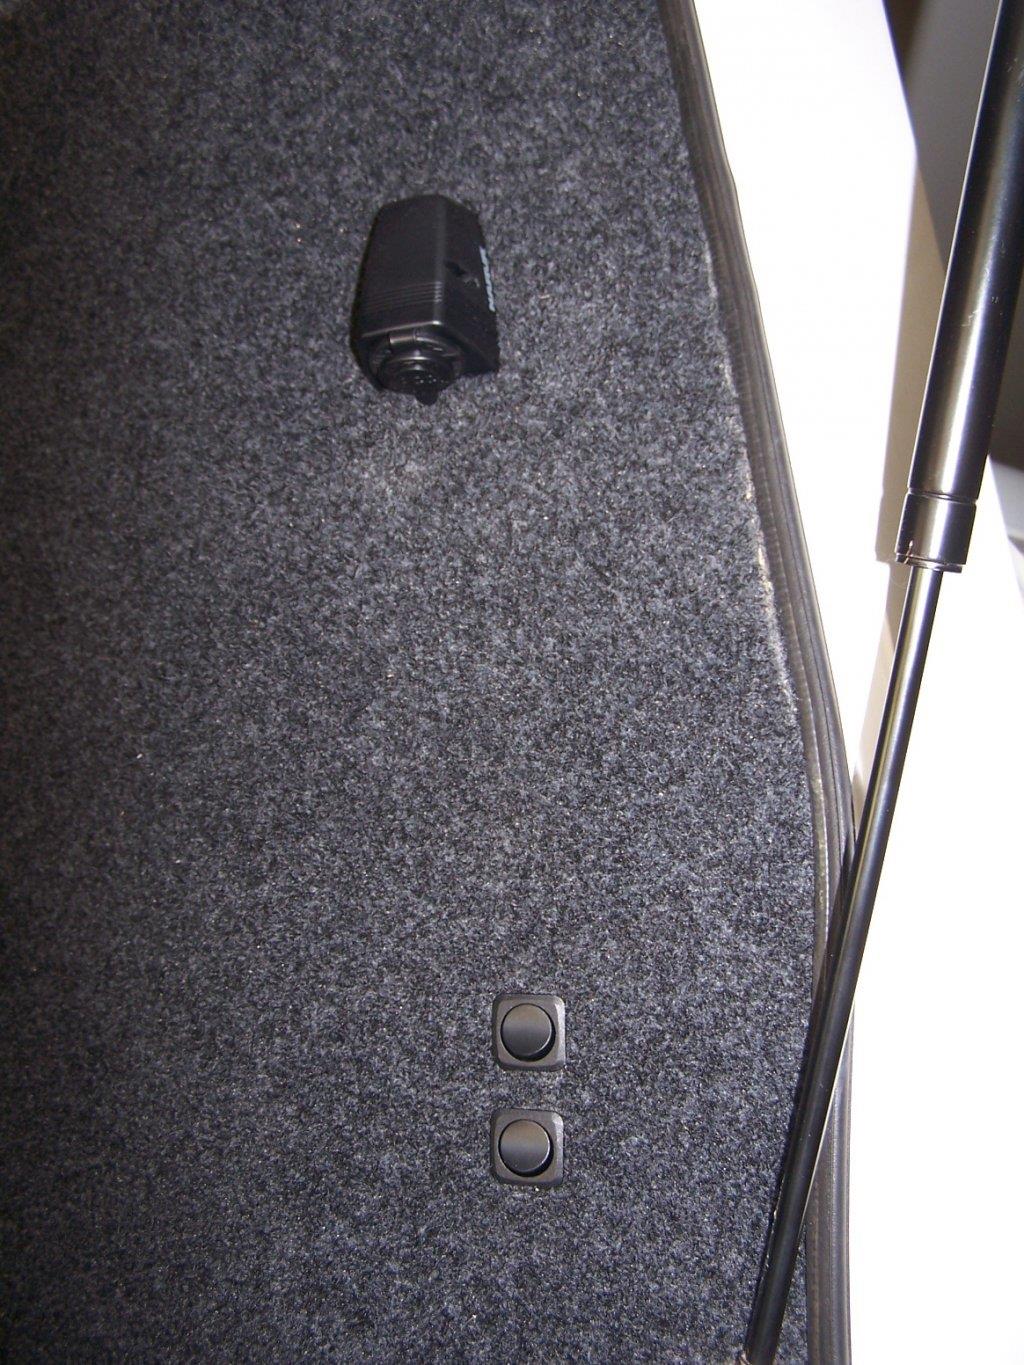
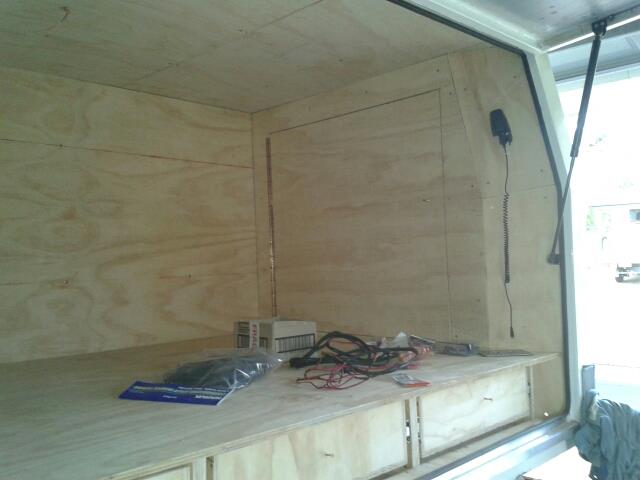
The main walls were made from 9mm construction ply and cost around $36 sheet and I used approx 6 8x4 sheets. Seems a lot but there is a false wall right across the front, as well as all the fiddly bits around and inside the gas and electrical areas and the ceiling. One point to remember is if you are fixing with self tapping pan or wafer head screws through thick steel frames(mine were2mm) buy the fine thread variety, as I had a box of coarse threaded ones and they either snapped off before they screwed right home or the cross head chewed out, not a thing you want to happen when putting screws in awkward spots or overhead.When I was scribing in the ply around an area where the carpet had to be cut neat to a finish as around the door frame with the inner seal installed, I had to allow at least 10mm for the thickness of the carpet.I chiseled out a groove for the bed light wire and slid a 10mm plastic tube over it as it was pushed up between the steel frame and the ply. Just a precaution to stop it wearing through and causing a short.
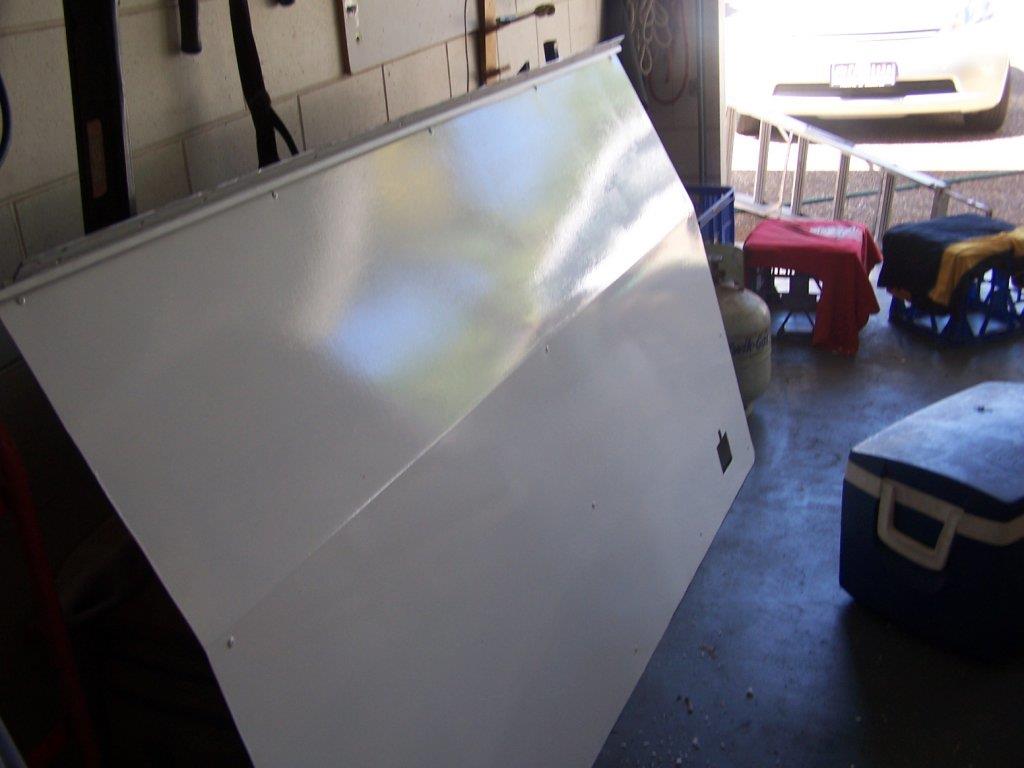
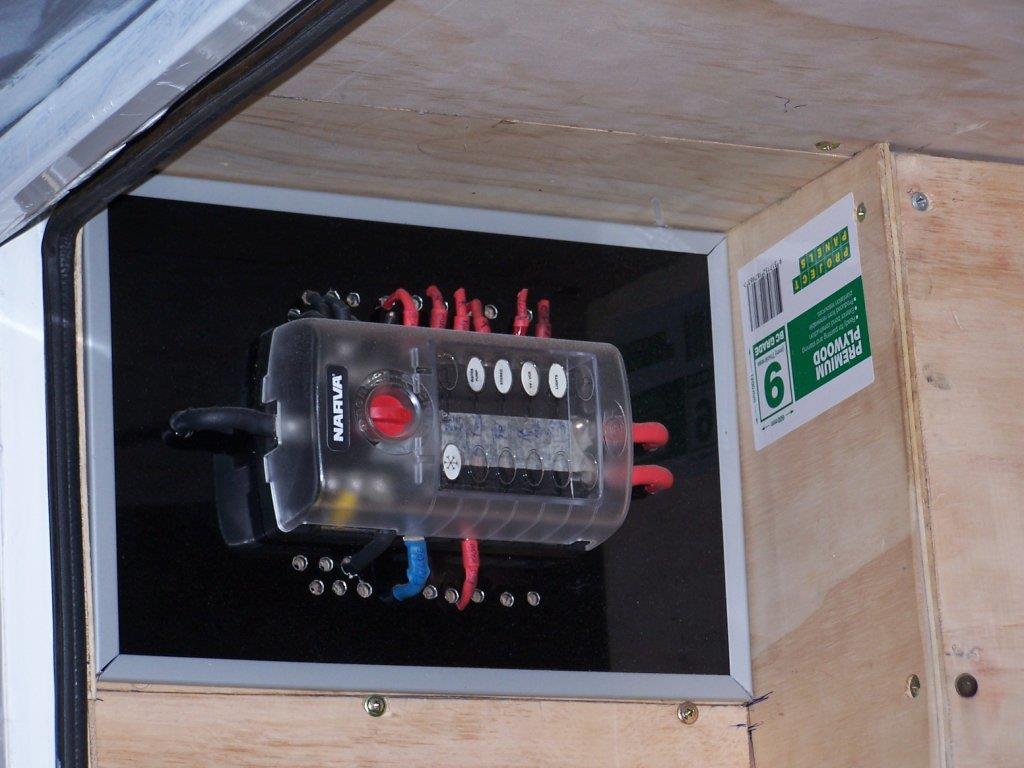
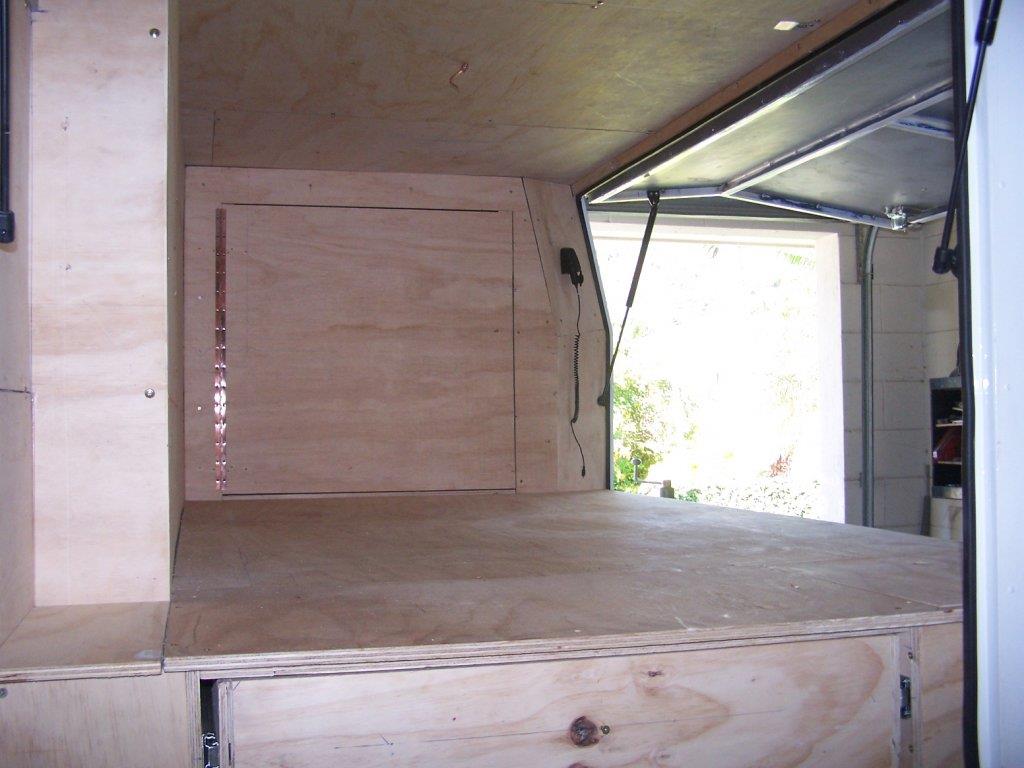
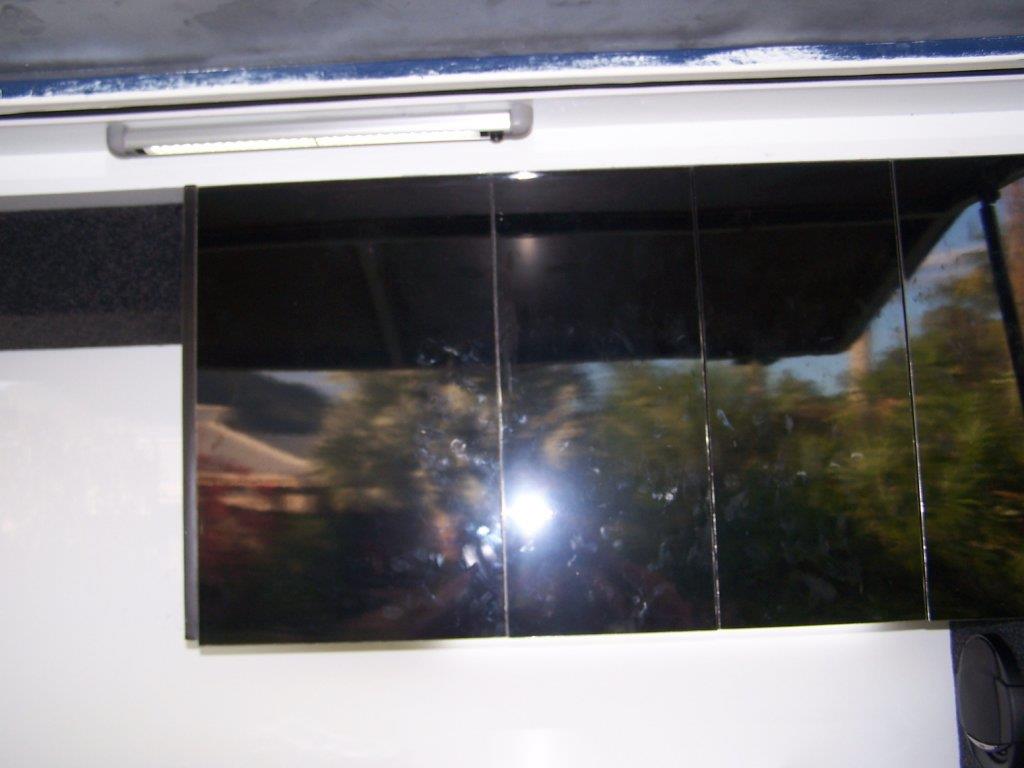
The false wall depth was determined by the depth of the satellite dish in the folded position(Access Antennas and Satellites from WA)200mm.I put ply on the frame them made packers or spacers and then the false wall ply. This inner ply gave me something to attach anything else at a later date.These packers can be seen in the previous prewire pics.
If I had misaligned a sheet at a corner I gave it a sand down with a belt sander to make it flush.
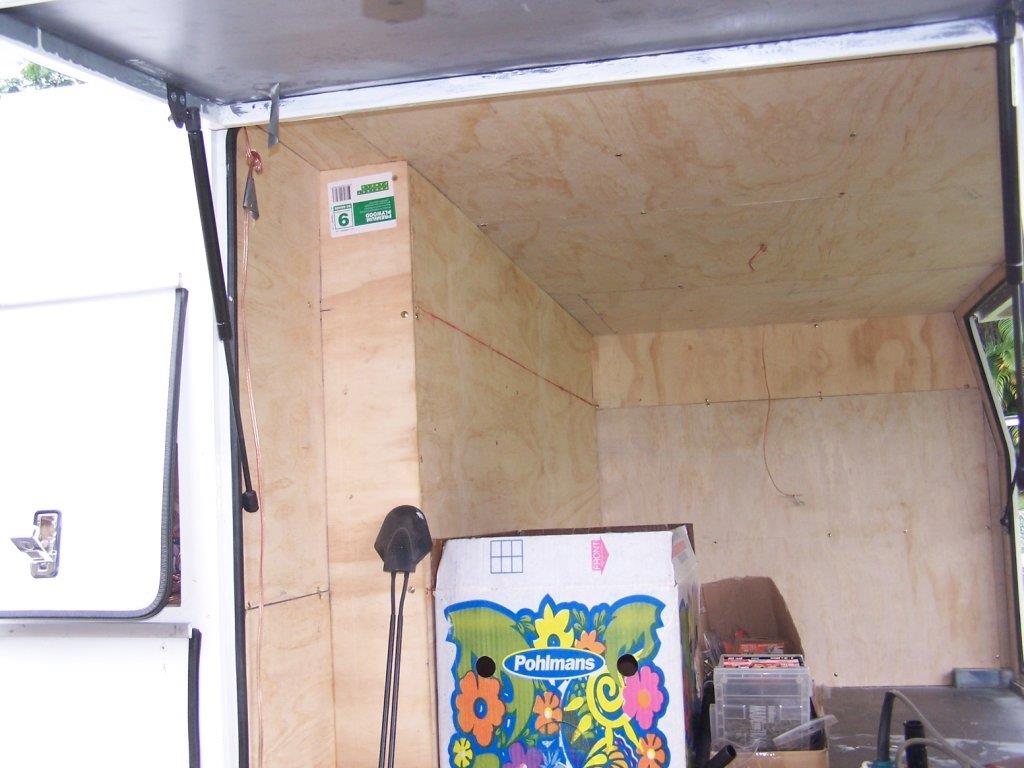
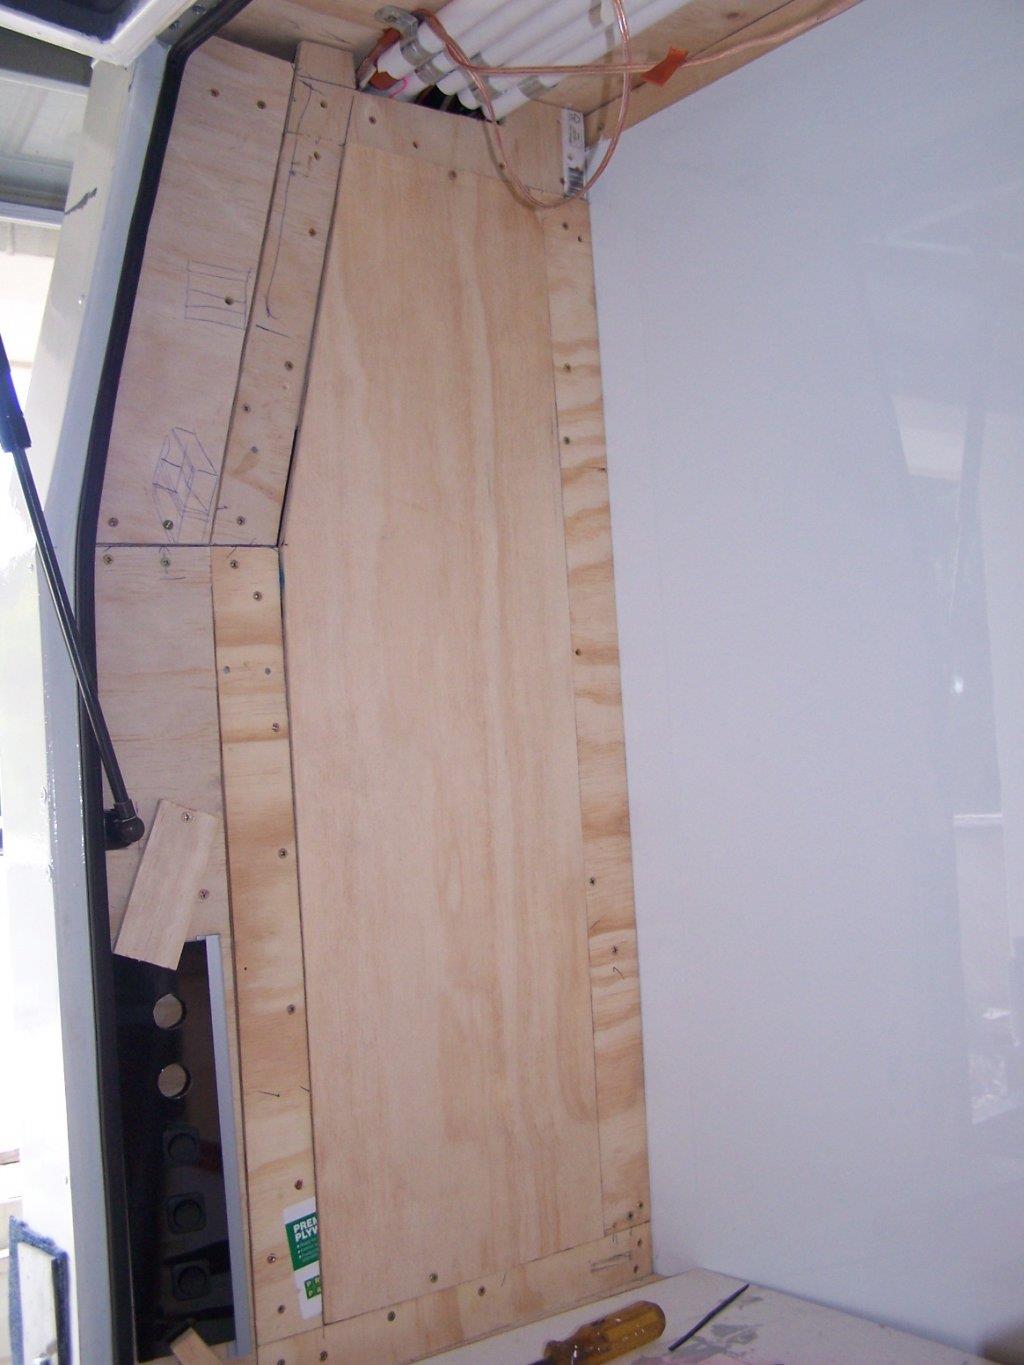
Because the frame was just that, a frame, I had not allowed for the sheets to be attached at the intersections of the walls and ceiling so I had to scribe around the ribs so I could screw them on. Bit of a pain and in hind sight a few tabs in the right places would have saved me heaps of time and effort.
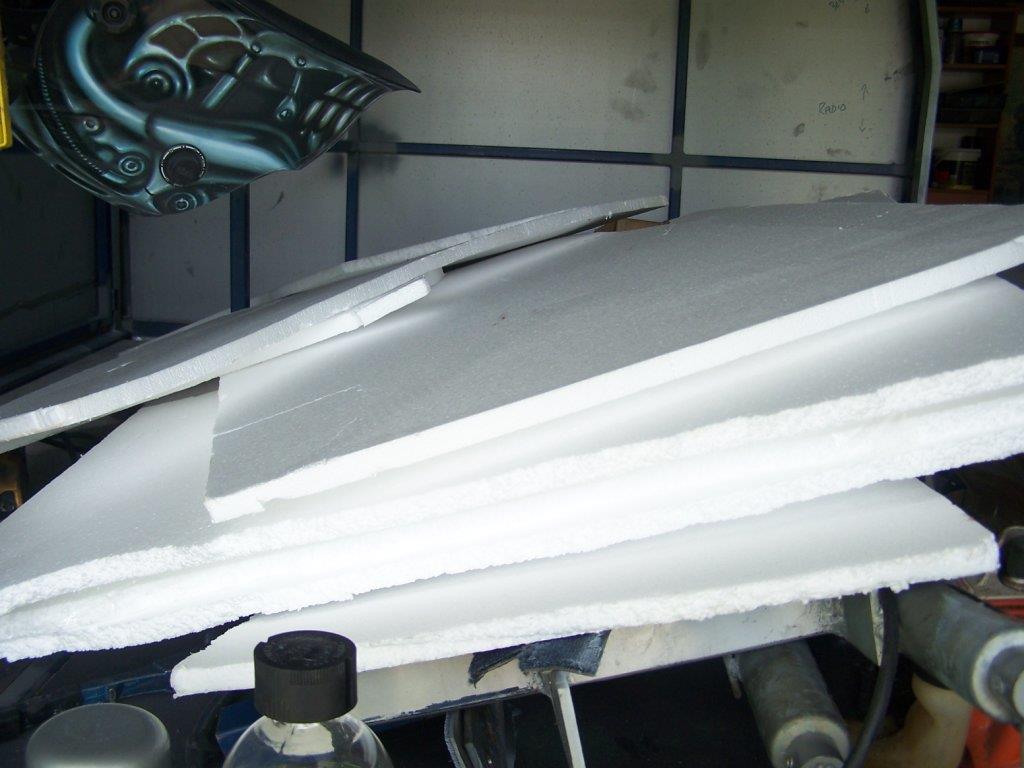
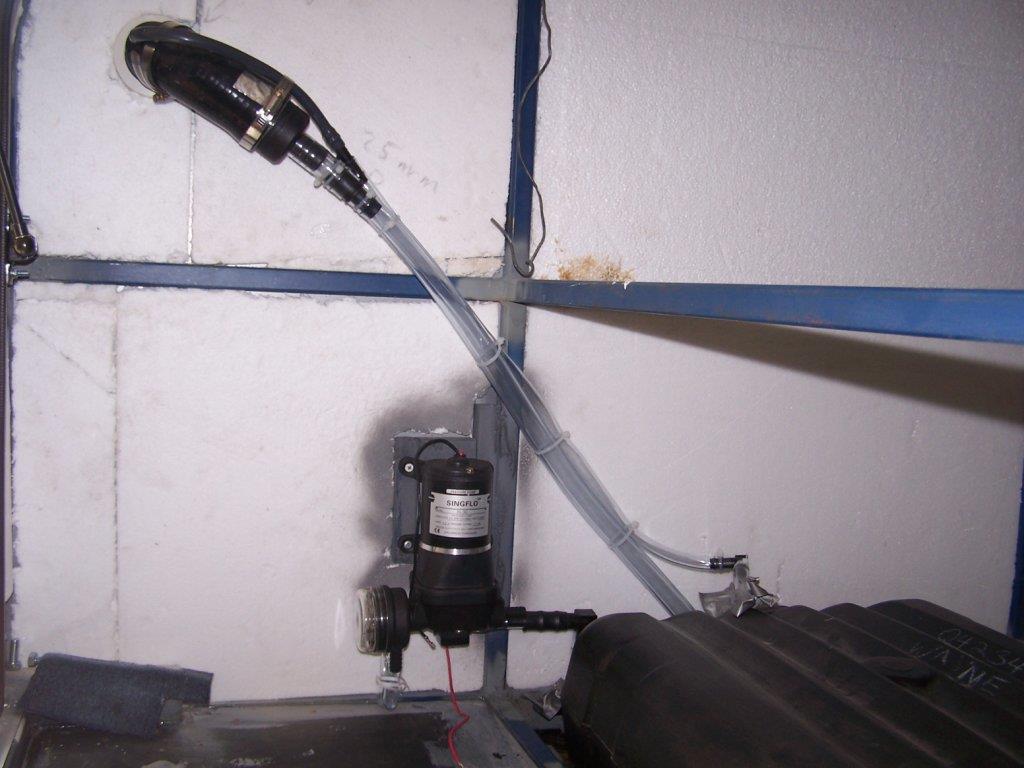
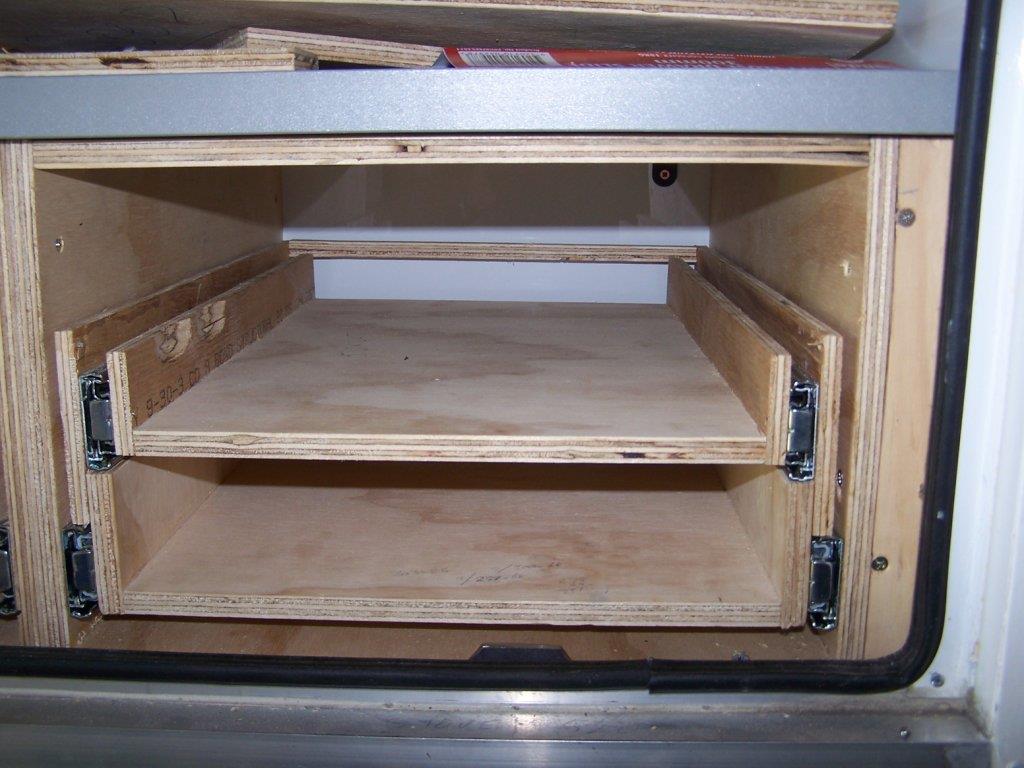
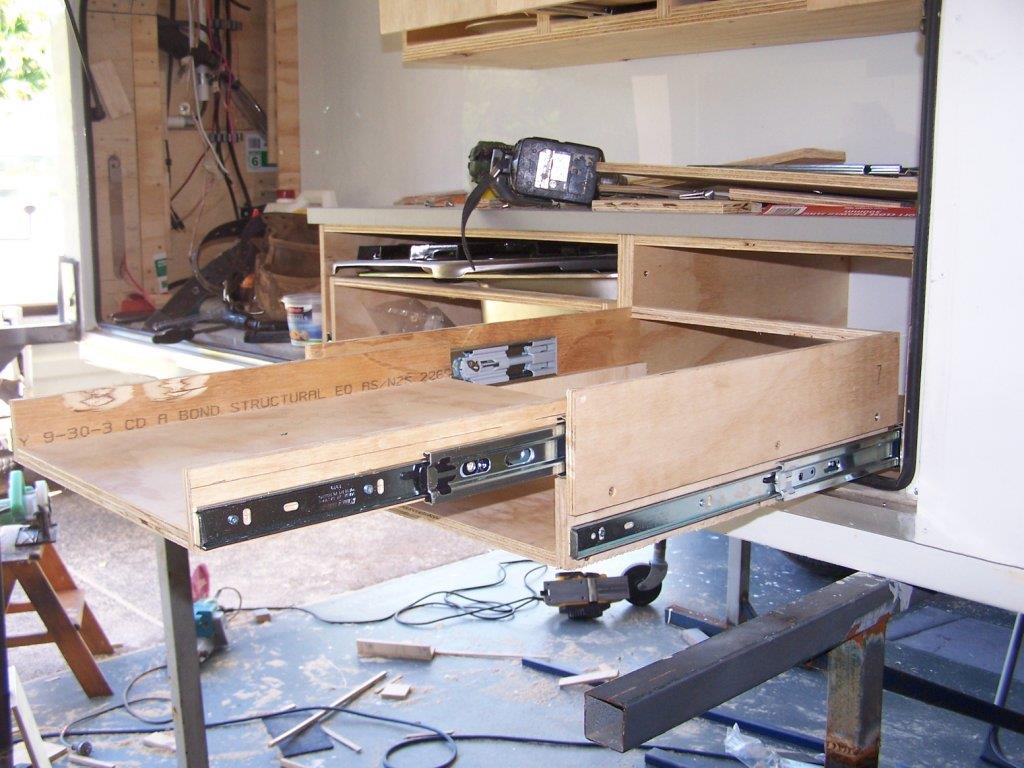
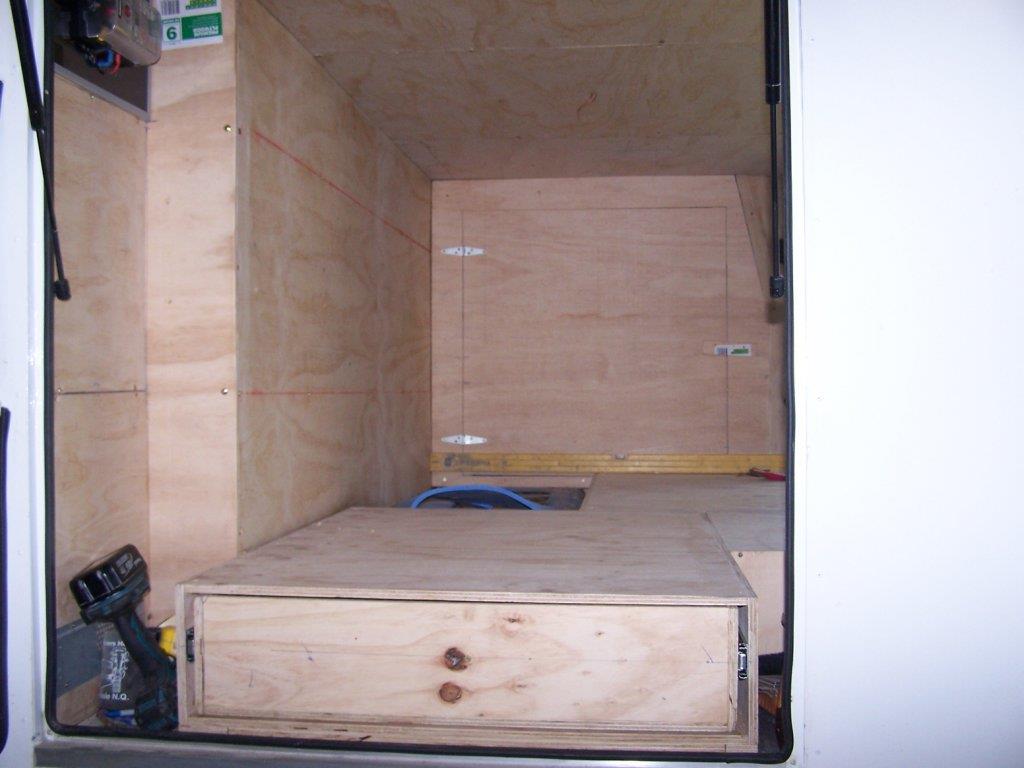
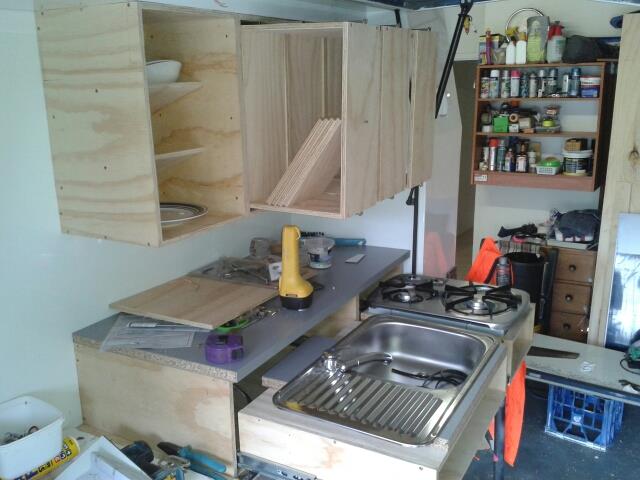
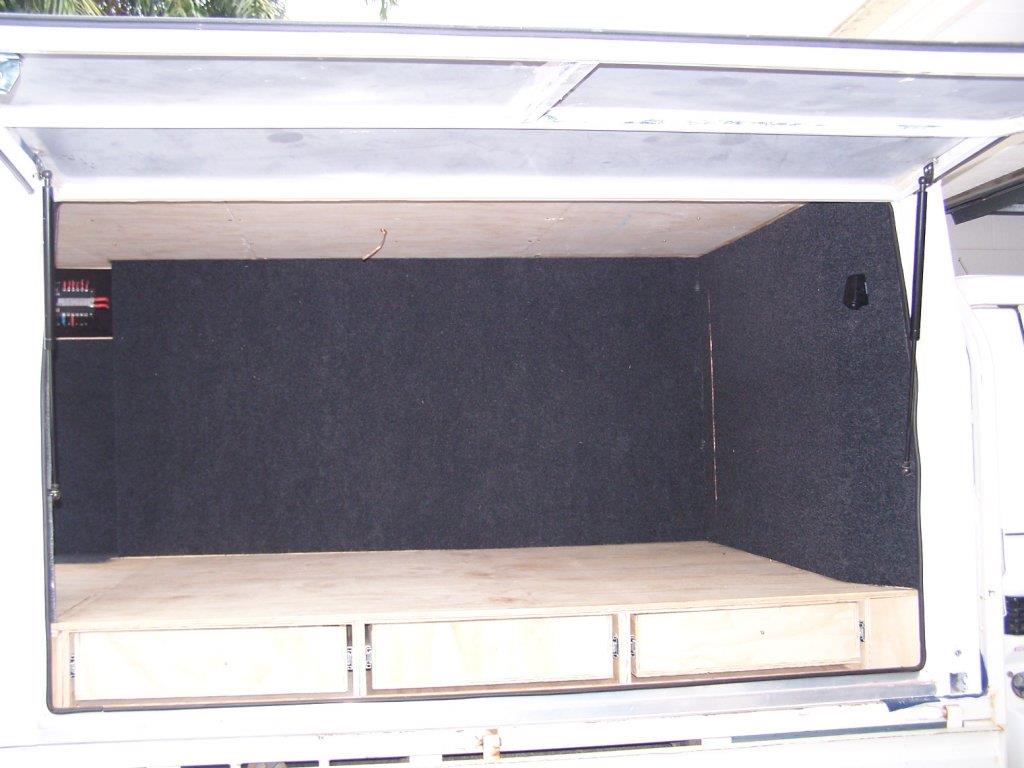
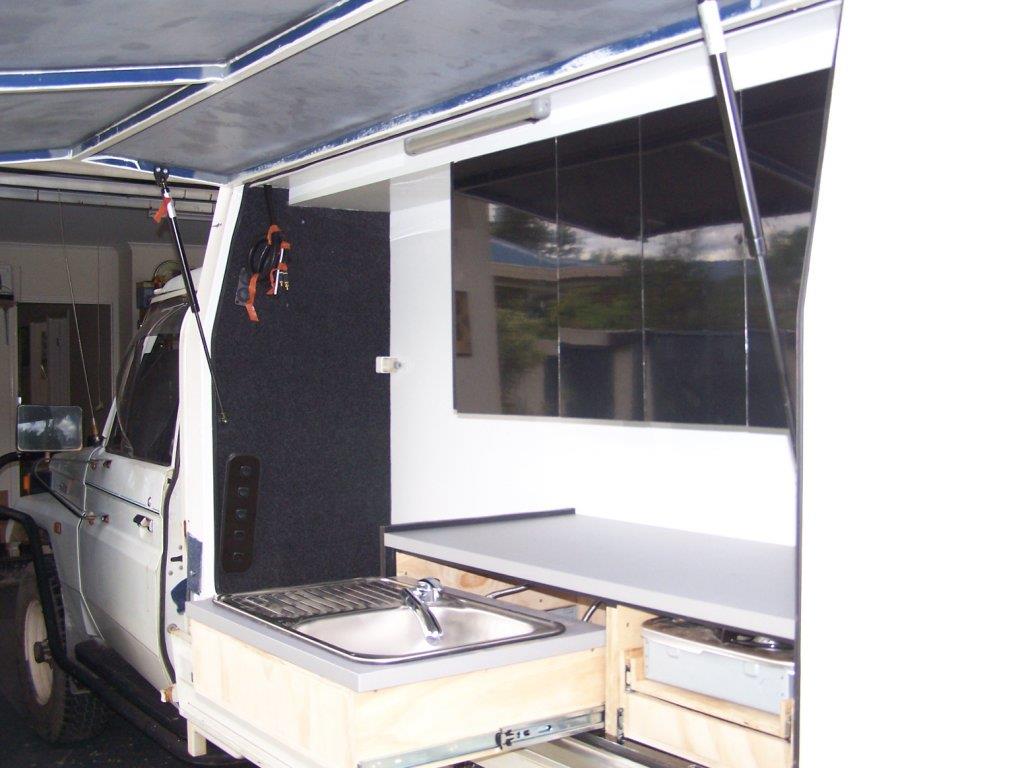
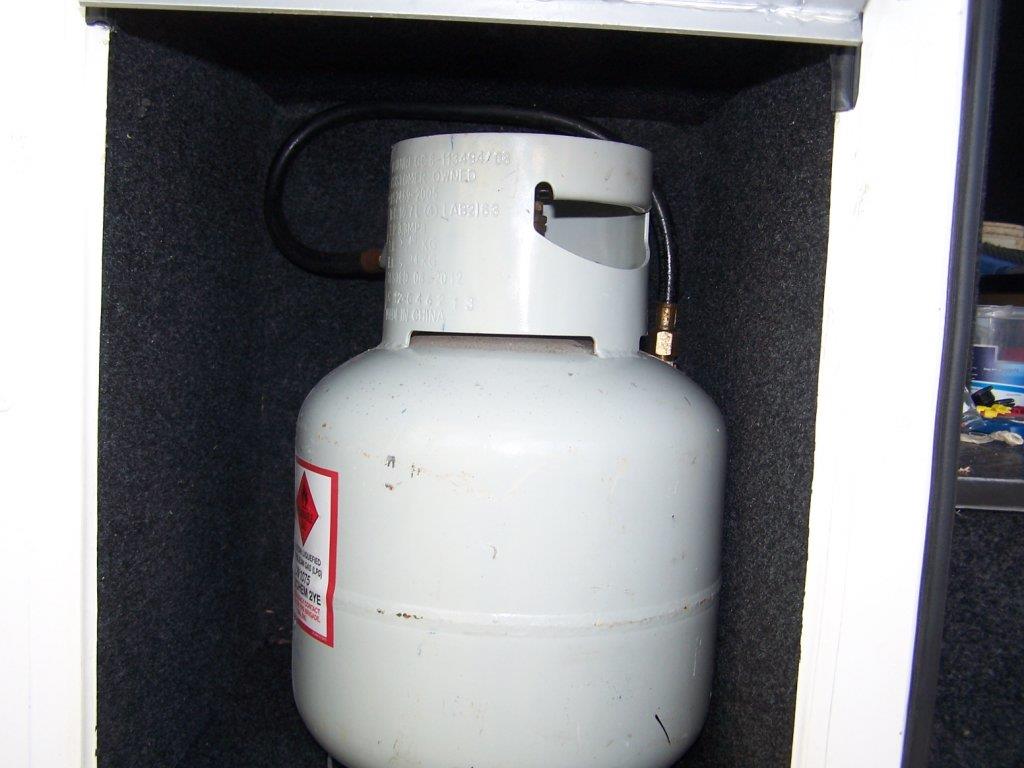
The water tank sat in its own recess to stop movement, wrapped in high density foam rubber for further protection and then I built around it with the drawer carcasses which cocooned it snugly in place.
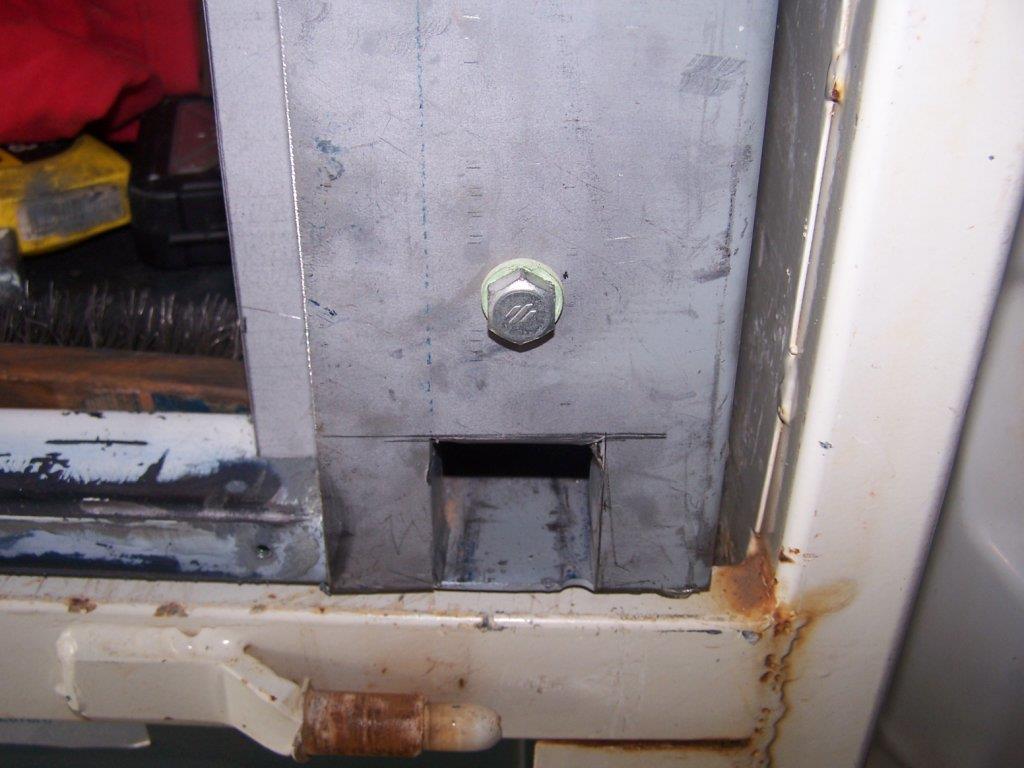
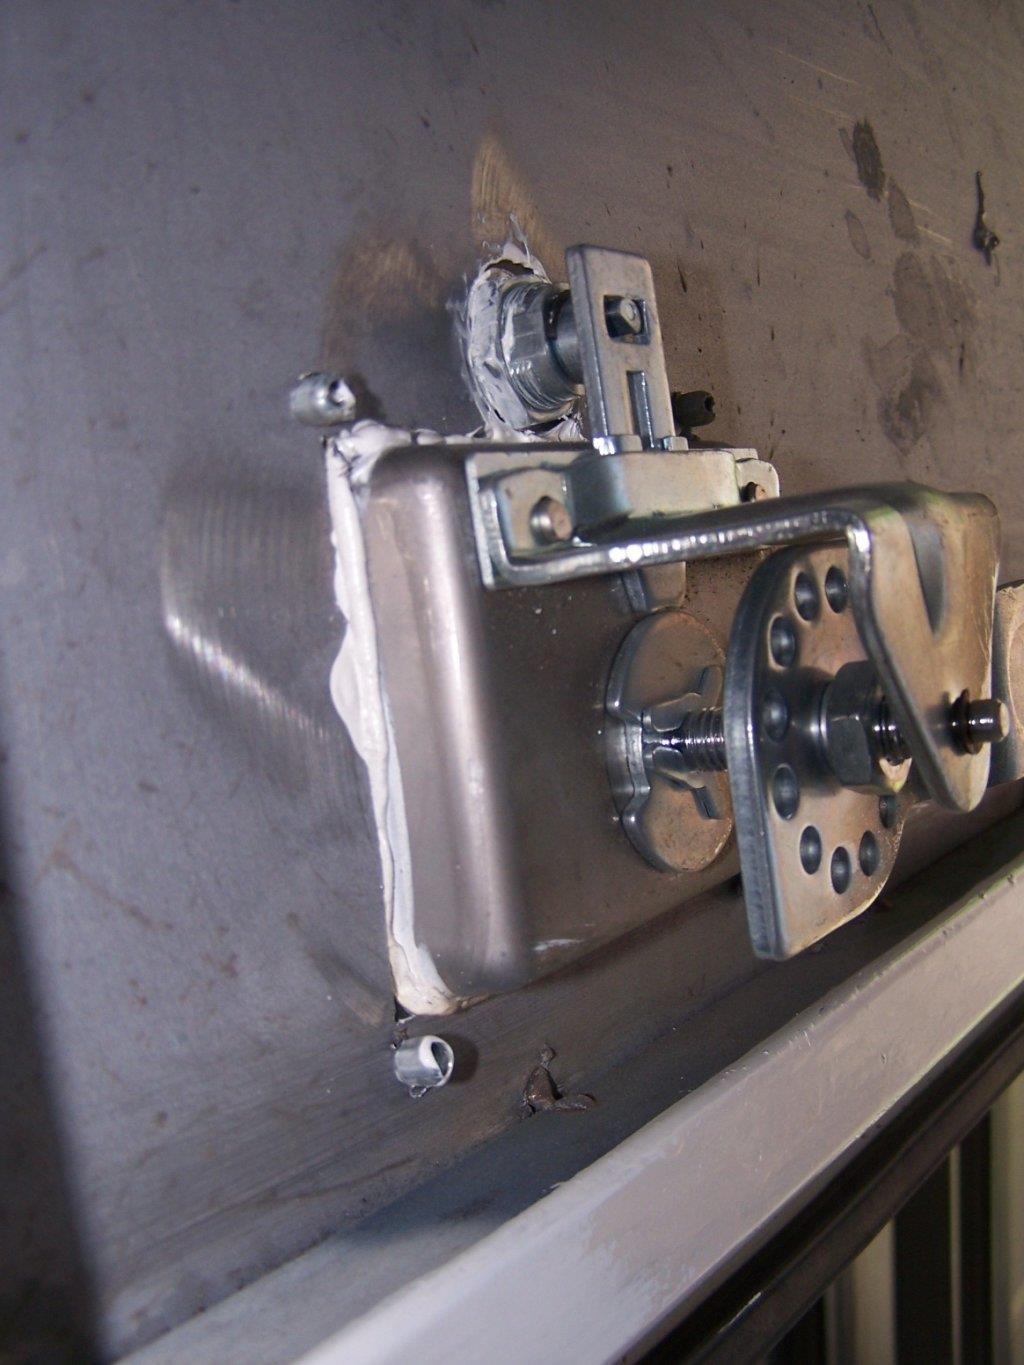
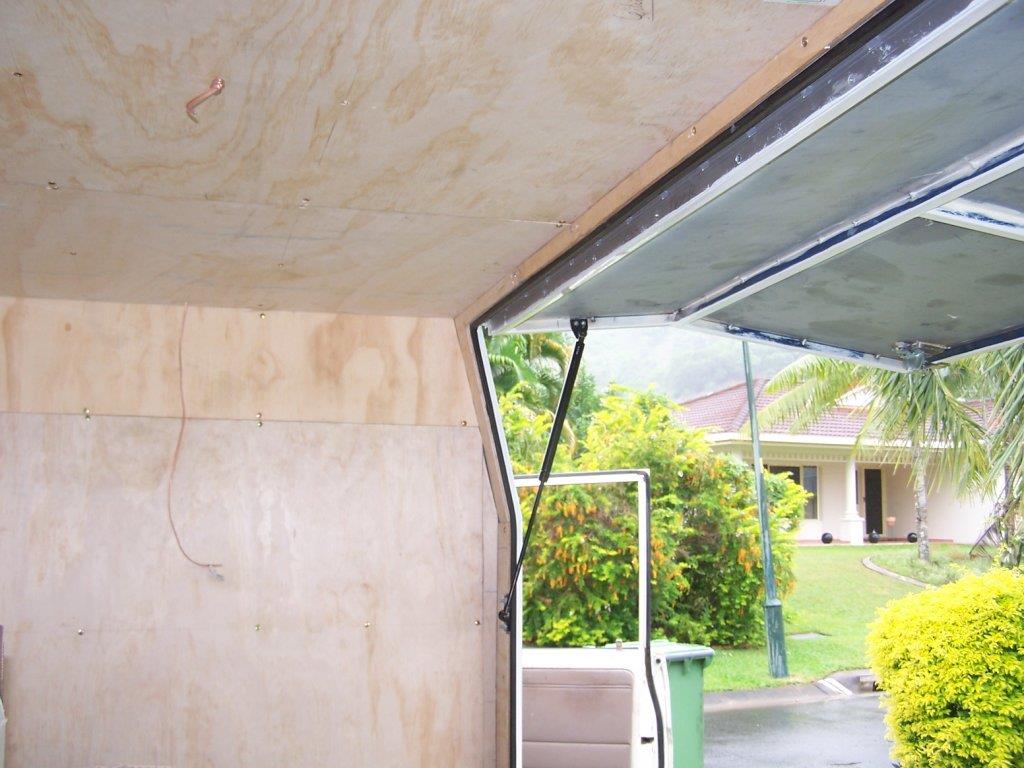
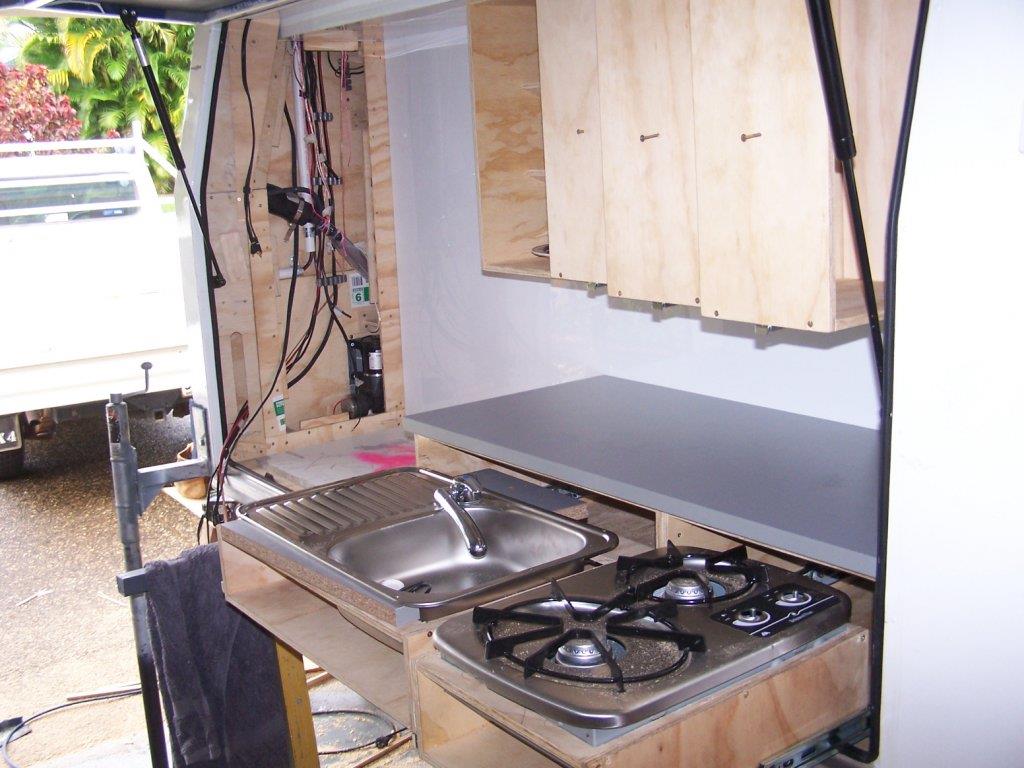
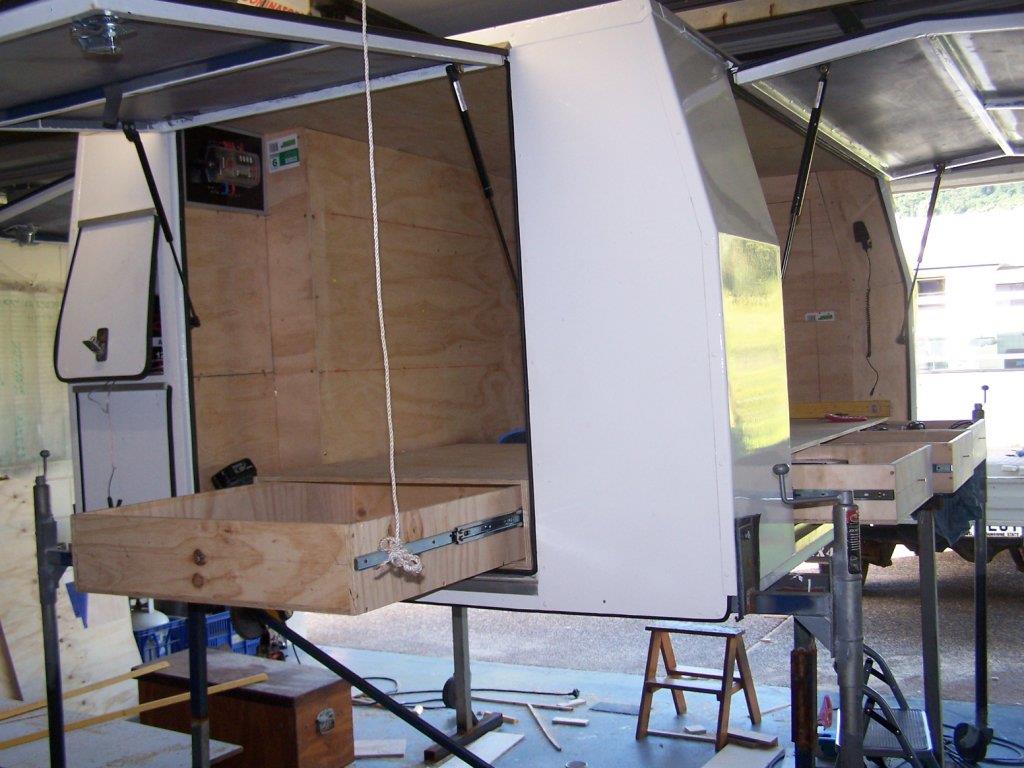
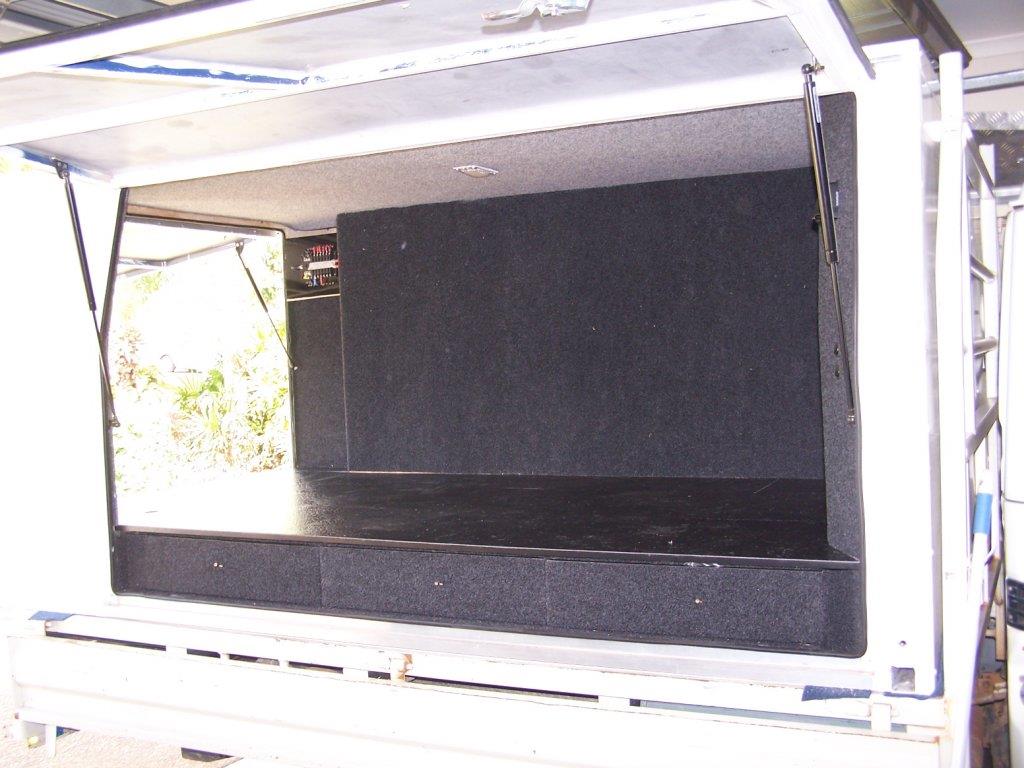
I did buy and install the struts for all the doors(ouch that hurt the pocket!) but all I had to do was weigh the door on the hinge, take the measurements and take all this info into the local gas strut shop and they worked out the NM for pressure and also the measurements where on the main frame and how far out on the door they should be attached.
To measure the door weight you simply open it to the position you want it to go to,and with a set of bathroom scales on the floor, prop up the door with a piece of wood or similar on the scales. What it reads is the down weight of the door and that determines the NM of pressure in the struts.

Next, drawers
1417084971_canopy_023.jpg
1417084909_canopy_022.jpg
1417085039_canopy_024.jpg
1417085230_dffd_030.jpg
1417085325_canopy_021.jpg
1417085424_canopy_050.jpg
 
Back again

The drawers were a simple matter of working out what I wanted to store and how best to lay out the configuration to achieve max use of the space I had. I ended up with 2 medium, 1 small, 1 large, a storage cubby hole that suited a milk crate and a very small cubby hole.
For the drawers I simply built a "carcass" that is a box that would house each drawer and screwed them all together in one big unit. In these I built the drawers with the slides, this way I ensured that all the drawers fitted perfectly and ran smoothly. It also gave a uniform top that would eventually carry the bed etc.Once all these were completed I screwed the whole lot down to the 18mm floor ply.
For the kitchen the process was the same except the pantry was vertical instead of horizontal and the stove system had a double slide instead of a single. Also a finished surface panel was screwed to the wall before the pantry and bench were installed. Even at this stage after using the canopy a few times I am thinking of changing the whole stove/sink unit to a swing out system.From here on the was moving into the fit out stage.
1419652172_canopy_059.jpg
1419652253_dffd_026.jpg
1419652325_dffd_029.jpg
1419652380_canopy_080.jpg
1419652438_canopy_052.jpg
1419652508_canopy_072.jpg
1419652556_dffd_018.jpg
1419652601_canopy_069.jpg
1419652633_dffd_021.jpg
1419652702_dffd_031.jpg
1419652846_2014-06-09_15.13.33.jpg
 
Back again finally.
The final finish was predominantly carpet and for this I ended up buying this from Bunnings as with most of the stuff on this build. I chose automotive as opposed to marine as there was little chance of the inside getting wet. The draw back here was not much colour selection, in my case charcoal thru to grey with about 3 or 4 variants, but when you are on a budget the cost of marine carpet v this stuff is a no brainer. For the surface of the bed area I used self adhesive floor tiles as there was a large colour range, cost($4.60 per tile),hard wearing as this area had to double as a "ute tray" and carry any gear I needed for trips. Also any damage to the tiles and they could easily be ripped up and replaced. For glue I found Sika liquid contact glue was tops as it could be rolled on both surfaces with enough time to brush in the edges and fiddly spots. The wall carpets were easy to install just by starting at one end and using a flat scraper working out the wrinkles and air pockets right across the sheet. The ceiling was a different story. I had my neighbor help me and after gluing the surfaces one person held up his end while the other stared his end off. This sounds easy but with the carpet wanting to flop down all around us with glue on it we did not come out of it without a fair amount of sticky stuff in our hair and on our clothes. Once started though, it got easier as we worked the sheet on. Although we used contact glue we still propped up the ceiling carpet with old ply pieces and left it to really go off for about 4 hours. I did use Sika spray on contact where the roll on method was not practical but this was a very expensive method.
The kitchen finished surface was easy clean wet area sheets. My choice was a sheet that had black one side and white on the other both of which were gloss. This enabled a matching colour scheme as seen in the pics. This was glued or blind screwed where poss.Another choice was the brushed aluminium look but this had a plain grey on the reverse side which didn't suit what I wanted. My neighbor is a cabinet by trade and he mitered all the angled corners but the average person would be able to use the plastic corner trims which are more forgiving.
Things went quickly after the carpet was installed as all the fittings ie electrical, water, latches etc were just formalities.
For the electronics I had to install a cheap amp which I bought from Supercheap, as with three different units:(radio head unit, local TV receiver and sat decoder)and with my limited electrical knowledge, the wiring involved to connect all these to one set of speakers (something about diodes and circuits etc) it was easier through a change over switch from each different to the amp.Works great so I must have done it right!
1420950180_dffd_038_2.jpg

1420950275_dffd_039_2.jpg
1420950353_dffd_043_2.jpg
1420950383_dffd_042_2.jpg
1420950541_dffd_050_2.jpg
1420950571_dffd_051.jpg
1420950600_dffd_052.jpg
1420950721_dffd_056.jpg
1420950835_dffd_080.jpg
1420951041_dffd_044.jpg
1420951182_dffd_077.jpg
 
Hey thx Doctor. I used it on the last weekend and thought to myself "why didn't I do this before"? Its so easy, I pull up where I want open the doors and start livin', or if I want to go all out spend 3 to 4 minutes setting up the gazebo and have a huge under roof camp. See pic. Now that is all set up, (I still a couple more write ups to do) The next thing is a quad bike. Then its just pullup, open up, unload, and drive off prospecting. Colby
1421204549_2014-08-04_13.04.03.jpg
 
Thats one fantastic setup you've built, im inspired now thanks dude,
I've got an old 6x4 trailer begging for some RHS and been wanting to break the welder out of retirement.

Well done and thanks for sharing the build
Cheer
Ryan
 
Thx Ryan
Believe me I am not a boiler maker or fitter welder or a chippy either, I am self taught with the welder and that has taken decades!!!(must be slow learner) but what I did have was time and plenty of it to think the whole project out. It took 9 months to complete working on it every other weekend as I work away week on week off, and lots of help and advice from a lot of good friends and helpers. Parts of the build literally evolved on the spot but I still kept the end product in mind. Would I do it again? You bet!
If some one had the dollars the easiest and simplest way would be to plan what design you want, buy aluminum box section and cut to shape and then get a local fabrication workshop to weld it up. The skin or sheets can then be bought and taken to be folded to suit and put on back at home.That way the basic weather proof shell is made and finished with the fit out done how ever time and money permits, as well as reducing the end weight. Having said that I have seen ali crack in high stress situations and in this case on the back of a ute with all the flexing is high stress.The cracks were professionally welded but a short time new cracks appeared along the edge of the repair weld. If this meant an ugly gusset on an outside skin ( and I have seen this on a very new canopy) then I would not be too happy. If your like me and enjoyed making the whole thing from start to finish then buy a carton sit back formulate a plan and get into it!!!
Cheers
Colby
 
Yep, a few beers and lots of paper time, is whats in order, my current setup is good and comfy, on my trailer ive mounted my rooftop tent, and this allows for all the prospecting gear to go underneath, but when i lost a highbanker out the back of said trailer i decided that I don't like that arrangement,LOL.

Anyway cograts again on your build, its awesome

Cheers
Ryan
 

Latest posts

Top