Diesel Heater Install

Prospecting Australia

Help Support Prospecting Australia:

This site may earn a commission from merchant affiliate links, including eBay, Amazon, and others.

condor22

Mike
Joined
Dec 16, 2013
Messages
2,495
Reaction score
2,430
Location
Adelaide, SA
Last year I trded my van in on a new one and due to the rapid turn around because of a planned trip (Laanacoorie Bash) I did not have time to take the diesel heater out of the old van, fix the holes it left and install it in the new one. I did get more trade in for the old one by leaving it in.

However, I went to Ballarat today and purchased a Planar 2kW Diesel to install in the new van. I'm still away for a couple more weeks, but shortly after will install the heater myself.

If there is any interest between now and when I start the install, I'll do a step by step with pics on this thread of the install.....

Just reply "Interested" to this topic. :)
 
Condor, I noted that you got the Planar 2kw. What were the criteria that helped you to decide on that unit versus the other 2kw units, such as are available from Pinnacle in Ballarat?

I also note that Pinnacle aren't advertising the Planar 2kw, so I couldn't see their price. Did you get yours from them or some other source?

Edit: Seems that the 2kw ones may be Planar, just not names as such on the Pinnacle site.

http://www.pinnaclewholesalers.com.au/camping-equipment/diesel-air-heaters

Thanks,

Rob.
 
Planar is the brand Pinnacle sell to the best of my knowledge, the heater is still in its box under the van bed, when I get to the install I'll check for the brand.

I had an Erberspacher (Dometic) in my last van, but didn't want to spend another $2k + to buy another.

I know someone who has had the Planar for 3 yrs and never had a problem. So for $815 for the full kit I wanted I'll see how it goes.

On that note, I rang Pinnacle 4 weeks ago before my trip, they were 2 days away from a new order coming in of 80 units. They said there would be plenty, so I wouldn't need to order as I was going to pick up from them. I got there about 2 weeks later and was told 40 units went to internet back order and the other 40 over the counter and were again out of stock.

I was not happy, however, the boss pointed to one that was in there office on the top shelf (the only one left). So, I left happy.

On to the install....
 
My method....
  • Planning[/*]
  • Measure up[/*]
  • Re-plan[/*]
  • Re Measure[/*]
  • Install[/*]
  • Commission[/*]
  • Test[/*]
  • Use[/*]

Planning - Not yet done, but I intend to lay out all the bits to first make sure I have all I need. Then look at the main items and where I am going to put them.

The main heater - I know roughly where and also the air to the van in/out 60mm ducting. This will also position the combustion chamber air in/out 25mm tube.
The fuel tank - I have that also sorted and in mind.
The fuel pump and filter
The controller

Then it's a matter of running wires and power from the battery and fuel line, which will hopefully fall in to place once the main points are decided.

Then I'll go back and visit the whole lot again to make sure, with as little mod./damage/holes etc to the van as possible.

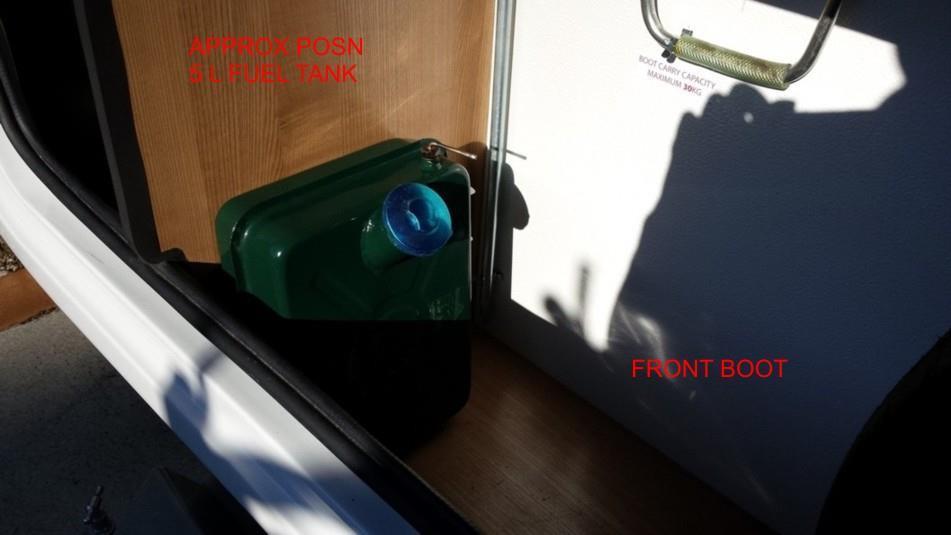
I intend to put the main heater under the bed, but then box it in so that it is insulated from bedding and storage items under the bed. Fuel tank in the front boot.

Will take pics and further info when I get to start the job in a week or so.
 
I'm interested as well.

Condor you are a wealth of knowledge.

Looking forward to it.

Thanks
 
1ST STAGE - PLANNING

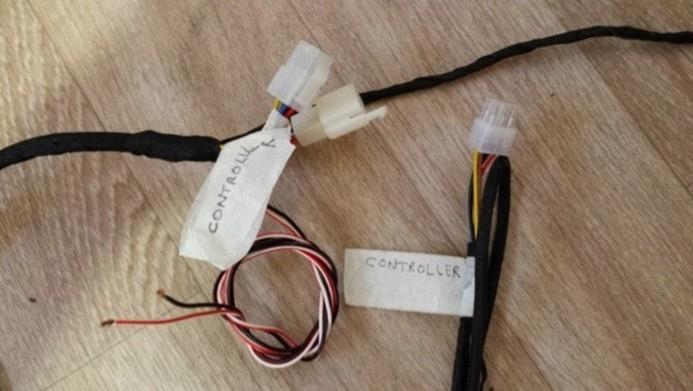
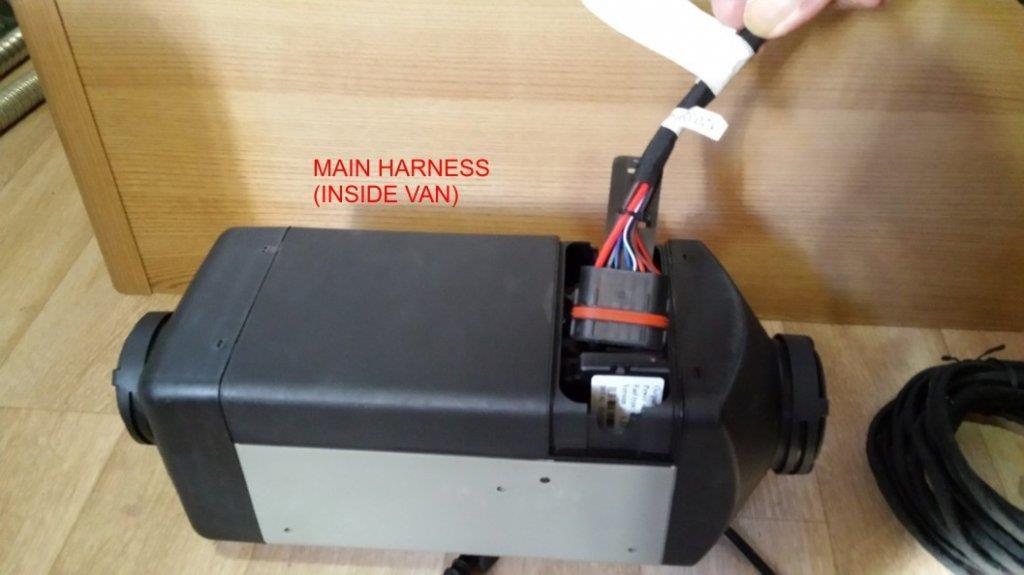
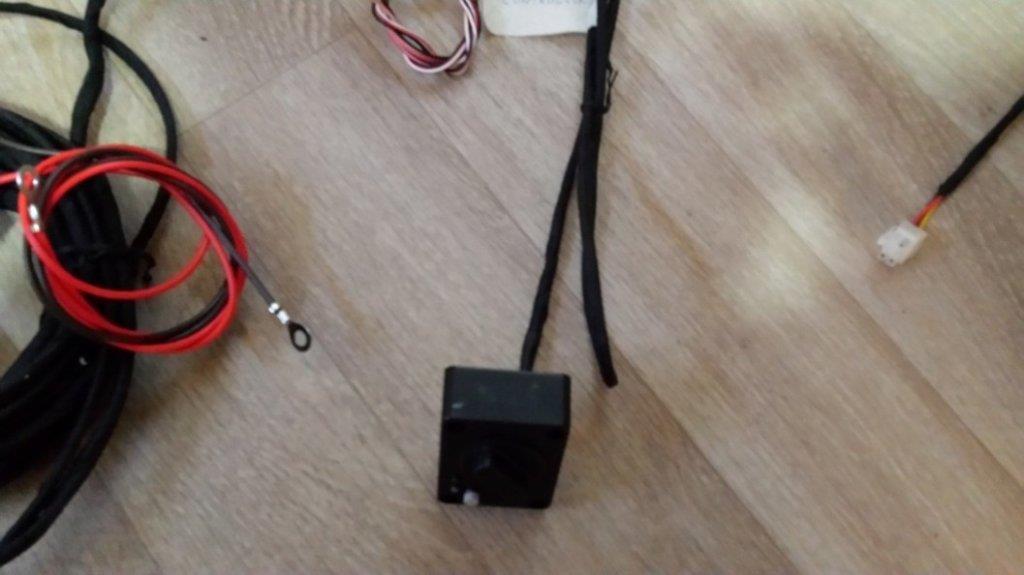
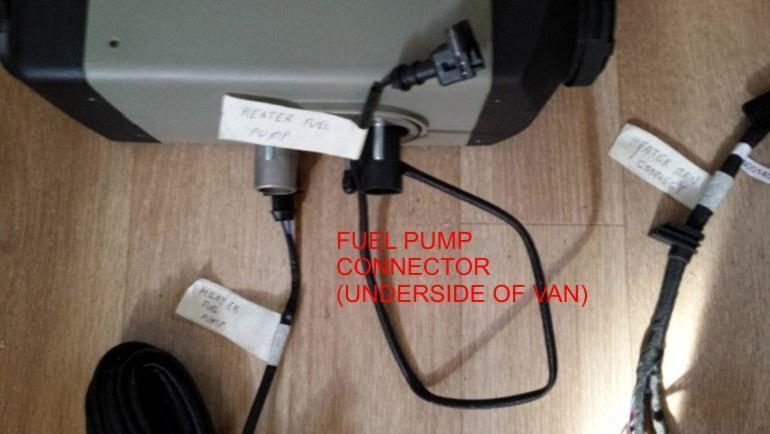
The first thing I did was get my head around the mess of cables and connectors, which eventually was quite easy. I marked them on masking tape.

Comes down to -

  • Main connector loom to heater[/*]
  • Heater to fuel pump[/*]
  • Main lead to controller[/*]
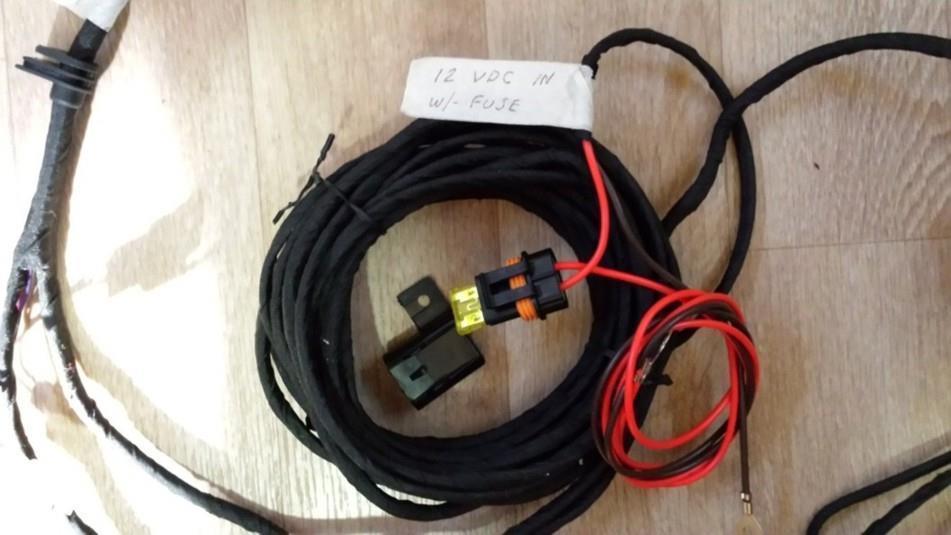
  • Power in from battery[/*]

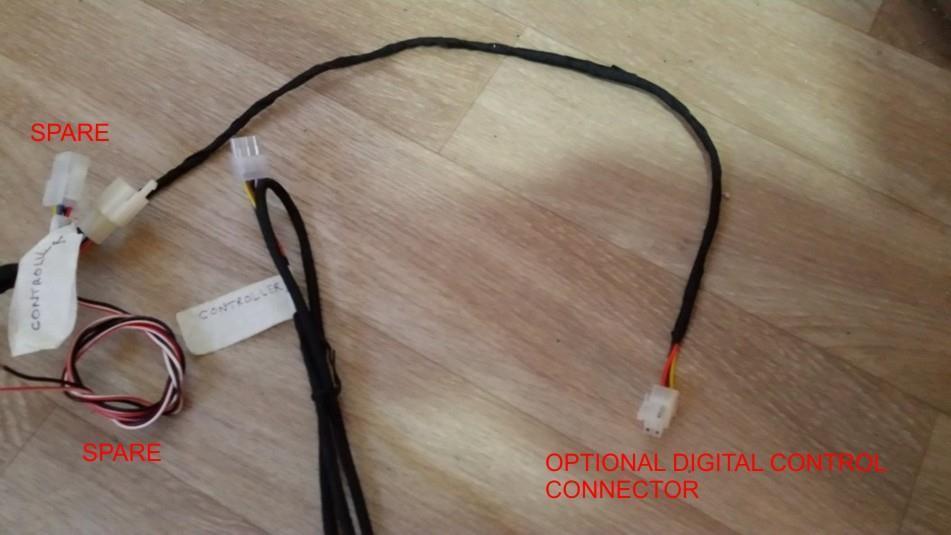
There are other connectors and wires which are not used in this install (remote control, test, calibration and diagnostics). But it's easy to work out as every connector is different, so only one plug will fit its mating socket. Refer Pics -

1431932484_cable_controller.jpg

1431932484_cable_main.jpg

1431932484_cable_spares_2.jpg

1431932484_cable_vdc_in.jpg

1431932484_control.jpg


Next - Positioning the hardware
 
The hardware to position is -

  • The heater body[/*]
  • The van air in port and duct[/*]
  • Warm air to van port and duct[/*]
  • Fuel pump[/*]
  • Fuel tank[/*]

The controller also needs to be placed, but that is my last priority as I am looking at getting the digital thermostat as an optional extra. (It is used as in place of the rotary switch controller, which still needs to be connected but not used. The digital control uses a different connector)

1431932827_fuel_1.jpg

1431932827_fuel_2.jpg


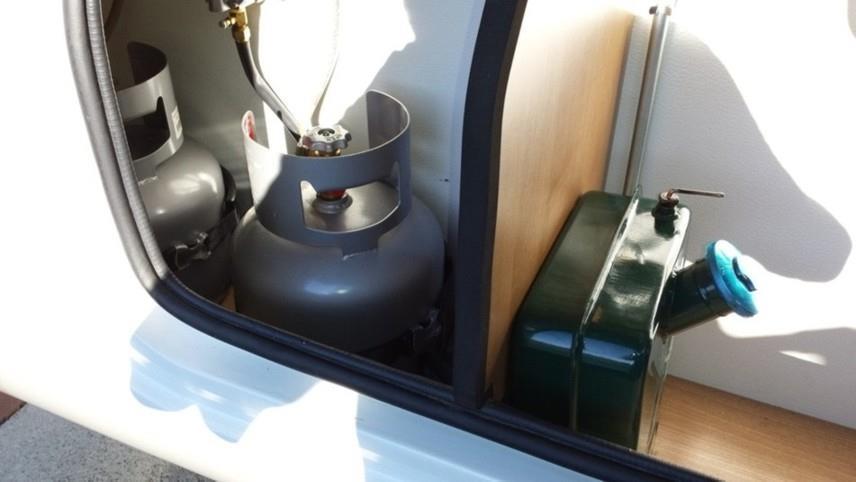
The fuel tank will fit in my front boot. I'm doing this for several reasons. First, there really is nowhere outside the van to mount it, in the boot it is out of sight even though it has a locking cap and finally, it's out of the weather.

Other approx. locations next -
 
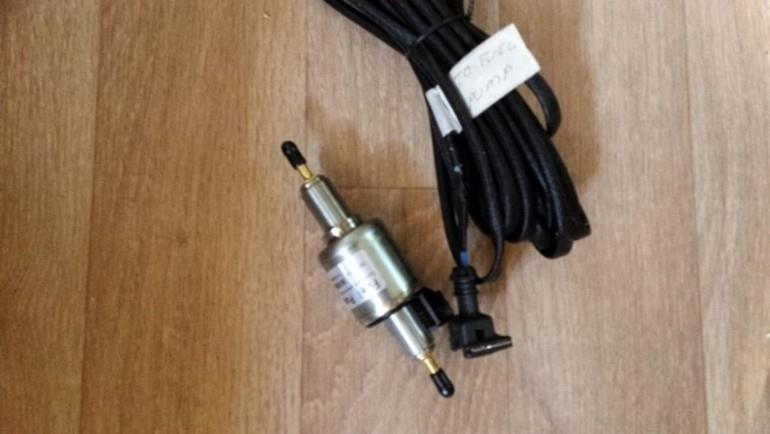
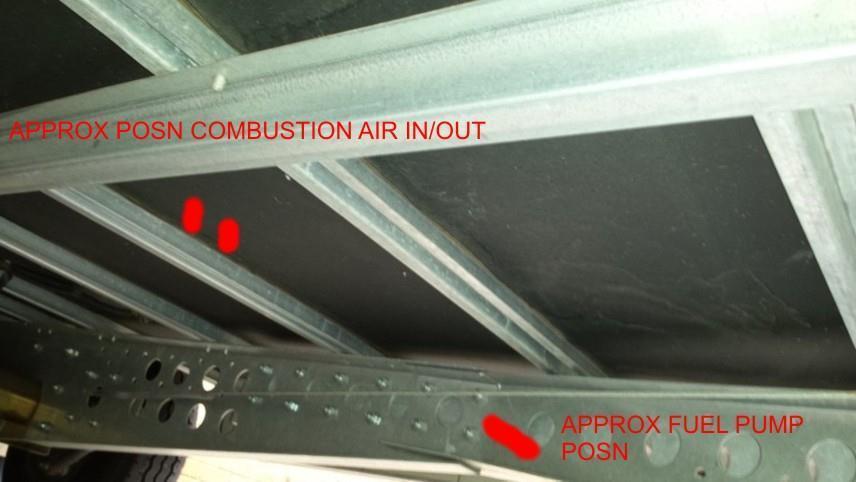
Next is the fuel pump, it needs to be outside under the van and installed at an angle with the fuel tube from the pump to the heater at a constant rise to the heater to avoid air traps. The inlet side is not so critical.

However, once all done the inlet fuel tube needs to be primed. On my previous van, my original fuel tank position was temporary, so I re located it and had to prime the tube myself. I used an oil syringe from Supercheap.

I disconnected the tube at the pump, put the closed syringe on the end of it and slowly drew the syringe ram out, so as to suck fuel down the tube. If it doesn't drip out after one go, then disconnect the syringe, push the ram in and do it again etc etc until fuel drips out. it is a very small amount as it's a small tube.

1431933367_pump.jpg

1431933367_underside_2.jpg


Next the main heater body -
 
The final piece of the puzzle (excluding the switch and 12VDC in)

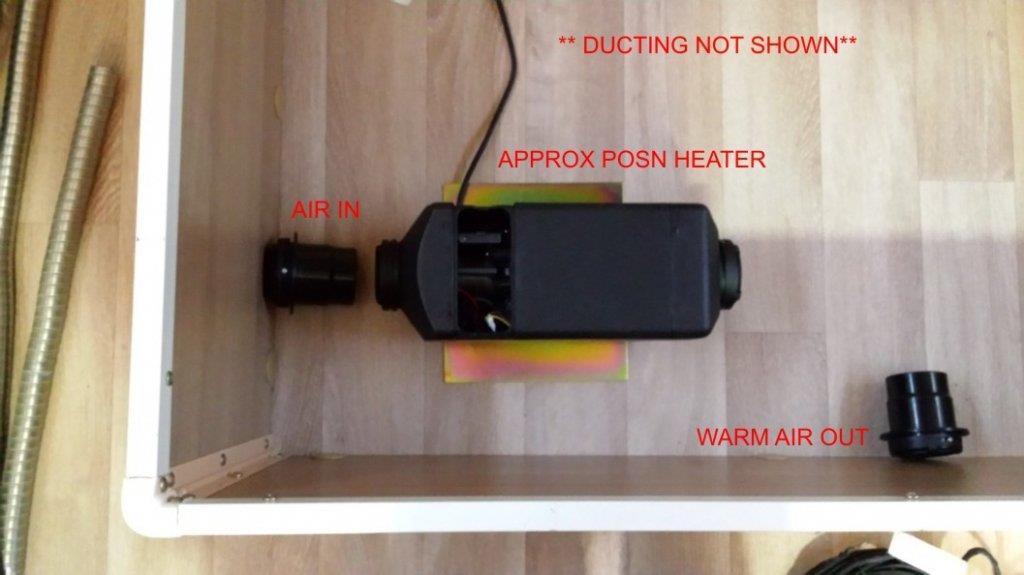
1431933472_heater_approx.jpg


The heater will be positioned under the bed. The "cold air" in will be at the side of the bed. The warm air out will be at the end of the bed and approx. central to the walkway further down the van. The outlet is positioned so that it does not directly blow on the fridge or people. So as the air at the other end of the van warms up and travels forward to the bed, the inlet will eventually be close to the desired temperature and slow down the heater to tick over and maintain like ant other thermostat controlled item.

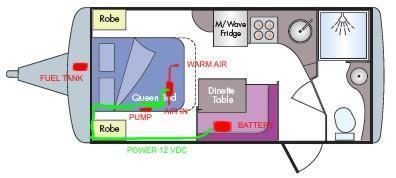
I'll see if I can find a floor plan and mark up the positions of things.

- next
 
LAYOUT -

1431934481_layout.jpg


In my van is a timber duct either side where the floor meets the side wall for van cable runs. This is because the walls are "Bondor" type composite (no frame) and therefore no cavity. I intend to use this tunnel which meets the tunnel boot at the bed head to run power from the battery.

Then using split spiral conduit under the bed to the heater.

Which brings me to the controller. I'm considering placing this on the outside of the wardrobe, above my head. My logic being, it's easy enough to get to whilst up and about, but if I want to switch off or adjust when in bed, I can do so without getting out of bed. Plus the cabling lends itself to do this.

The final part will be to build a bulkhead and lid to enclose the heater from other stuff stored under the bed and also to separate the heater from the bedding above it.

All for now, I need to look at going to Bunnings for a 60mm holesaw and other bits and more time to consider my plan.........
 
Had a think about what's needed -

The kit comes without a muffler, but I bought one with the heater. The muffler pipe is not very long, but I have some left over from my last heater.

Exhaust -
  • 2 more clamps, one either end of the muffler.[/*]
  • Some alum/copper or none rusting tube to act as standoffs for the muffler to be screwed to the van frame.[/*]
  • Screws, locknuts and washers to fix muffler, preferably stainless.[/*]
  • Muffler Gasket cement to ensure a seal.[/*]
  • Additional P clamps or saddle clamps to hold the muffler pipe.[/*]

Wiring -
  • Sufficient split conduit to protect all wiring runs, particularly under the van.[/*]
  • Clips, clamps, saddles etc to fix cables (to suit split conduit).[/*]

Fuel -
  • Clips, clamps, saddles etc to fix fuel line, again protected with split conduit. (to suit split conduit).[/*]
  • I'm looking at cutting a larger jerrycan as a drip tray for the fuel tank.[/*]

Tools -
  • Holesaw 60mm.[/*]
  • Spade bits to suit heater pipes through floor.[/*]

I have some spade bits and hole saws, split conduit and various clips clamps and cable ties, so I need to check what I have against what I need.

The other important thing I need to establish is how to get the fuel line out of the front boot to under the van and in a way that will keep it from road damage.
 
Thanks Wolf

Went to the hardware today, got the 60mm hole saw, muffler mounts sorted, extra hose clamps, a jerry can for a drip tray etc. Already have a spade bit for the 30mm holes.

Also got a stud finder, easiest way to make sure I clear the frame underneath.

Have start to mark out the heater position and decided the Planar vents, although serviceable, are crap. I have a swivel hooded 60mm duct outlet left over from my Dometic install in my last van and have decided to buy a flat one for the Dometic. They are easier to install and much better quality and the same size.

Will add pics tomorrow night.

Still got to get some cable clamps to suit the split conduit.

Still planning and measuring, haven't drilled a hole yet, but close.
 
Awesome stuff condor.

As you know Winter in its glory in and around
Maryborough Gets very cold. This setup is going
to keep you very warm.

How awesome its gonna be to wake up warm
In the morning rather waking up warm in bed
But with the chill in the air.

Its something I have contemplated doing if i
Purchased an avan.

Look forward to seeing more.
 
Bugger - Went to the caravan spares shop this morning, got the vent outlet, only to find that the one I asked for was not the one I got.

I wanted the 60mm, I was given the 75mm, moral - check the package before paying and leaving the shop.

I have phoned them, they will take the return and have ordered the right one as no stock.
 
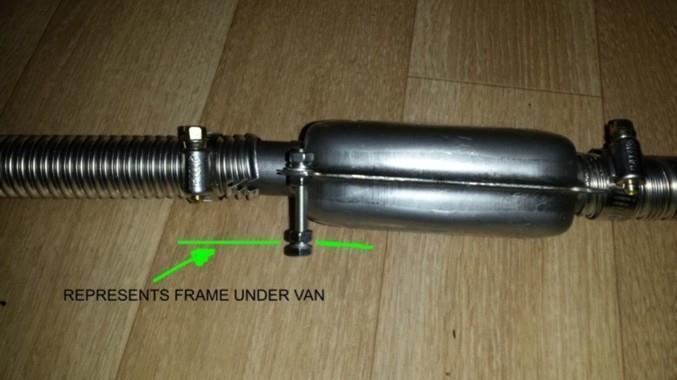
The muffler standoff consists a hex head stainless set screw 3 nuts, washers and spring washers. I'll drill a 5mm clearance hole, put the bolt through and tighten with a washer, spring washer and nut. Then at the other end I'll sandwich the muffler between 2 nuts with washers etc. It uses 3 mounting holes.

I got 2 extra hose clamps, the tube is a bit loose on the ends of the muffler so I'll grind a 10mm long split at the end and cover half of it with the clamp.

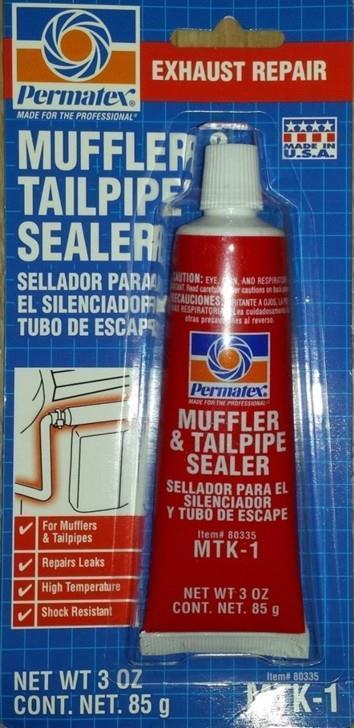
I'll also use muffler sealer to make sure there are no leaks under the van.

1432127588_20150520_144954.jpg

1432127588_20150520_145332.jpg


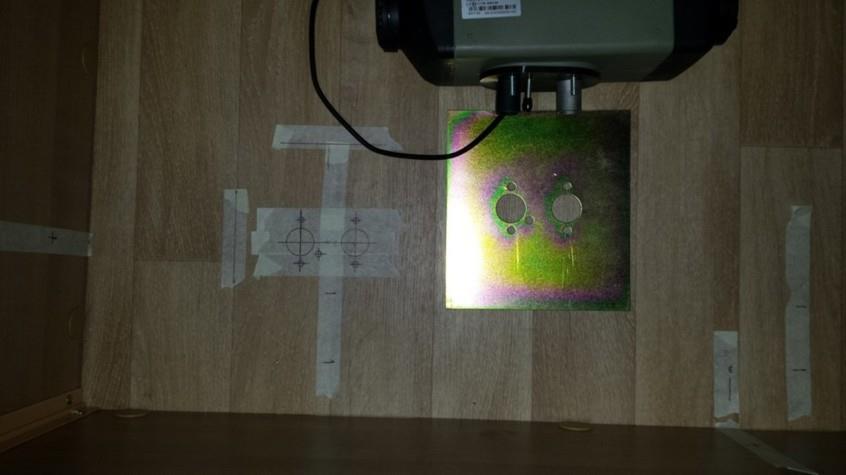
To the heater, as you can see I've placed masking tape where I marked out the hole positions. I still need to cover the 60mm hole positions with tape where the hole saw will cut. This is to reduce the risk of cracking the veneer during drilling.

When cutting such large diameters you need to spin the drill very slowly with gentle pressure. I'll drill the pilot hole with a separate drill (same size as the hole saw pilot) all the way through, so I can mask the outside surface as well.

1432127943_20150520_145311.jpg


The 2 lines at the lower part and either side represents the frame under the floor the stud finder located.
 
TIME OUT -

I won a bit of money on the pokies today :lol:

The reason I bought the Planar was the price $815, I didn't have $2,000 to spare for the Dometic. Now I do (yes it was a good win)

So I'm going to re-pack the Planar and am ordering the Dometic tomorrow. It won't get here till the end of next week, so the thread is on hold for now.

The markup so far will still apply, they are the same size and configuration.

So I want to sell a brand new never used Diesel Heater. Would like to get $700 back for it o.n.o.
 

Latest posts

Top